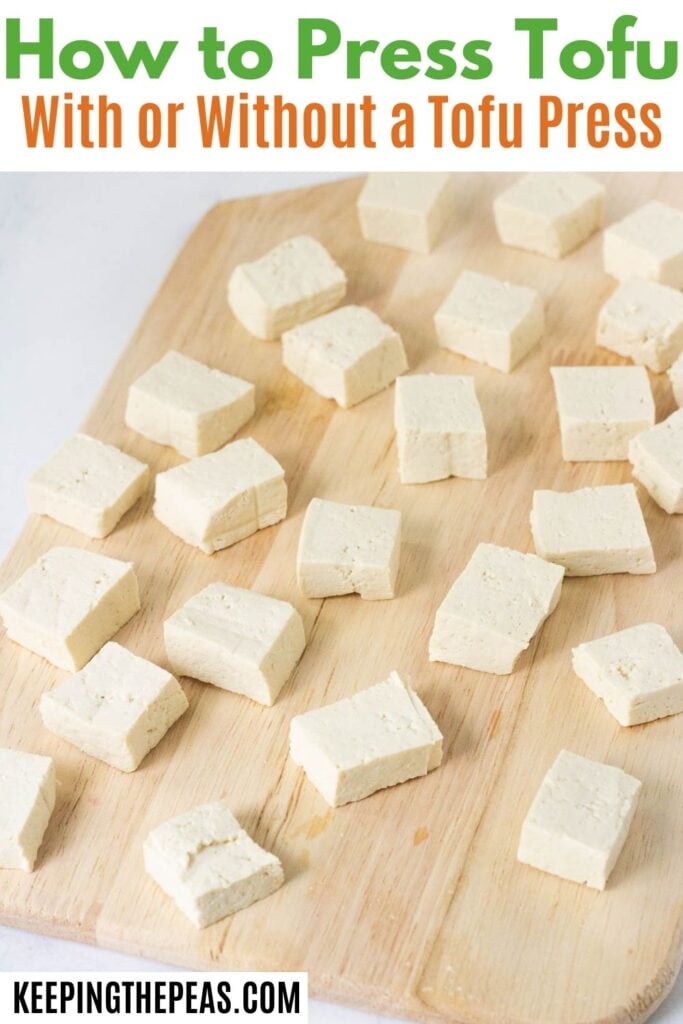
Learn how to press tofu in this step by step guide. You’ll have firm and crispy tofu in no time at all to enjoy in your favorite vegan recipes and vegetarian dishes!
Save This Recipe
I use tofu (or bean curd) on a weekly basis. It’s great in the air fryer, with fried rice, buddha bowls, stir fry, and more!
I find myself explaining how to press tofu often, and I’ve found some tips and tricks of the trade in my experience.
Whether you have a tofu press at home, or you’re doing it without, you can have extra firm tofu with a great texture for all your favorite recipes in no time at all!
Why press tofu?
It’s important to press tofu to remove the excess water. Each tofu block is stored in water to keep it fresh. It also contains so much water inside. The result is a wet and watery consistency.
If you don’t press your tofu prior to cooking it will make the rest of your recipe watery, plus it won’t absorb the flavors of the spices, sauces, and other ingredients as well.
Do you have to press all types of tofu?
No, you do not have to press all types of tofu. The texture of tofu varies on the type you buy.
Silken tofu, for example, should not be pressed. It’s lighter in consistency and often used in smoothies, or desserts to create a creamy custard like finish. Pressing silken tofu will cause it to fall apart.
Soft tofu is also rather delicate, and I do not recommend pressing it. If you choose to press medium tofu, do so with caution. It can handle a light press.
What kind of tofu works best?
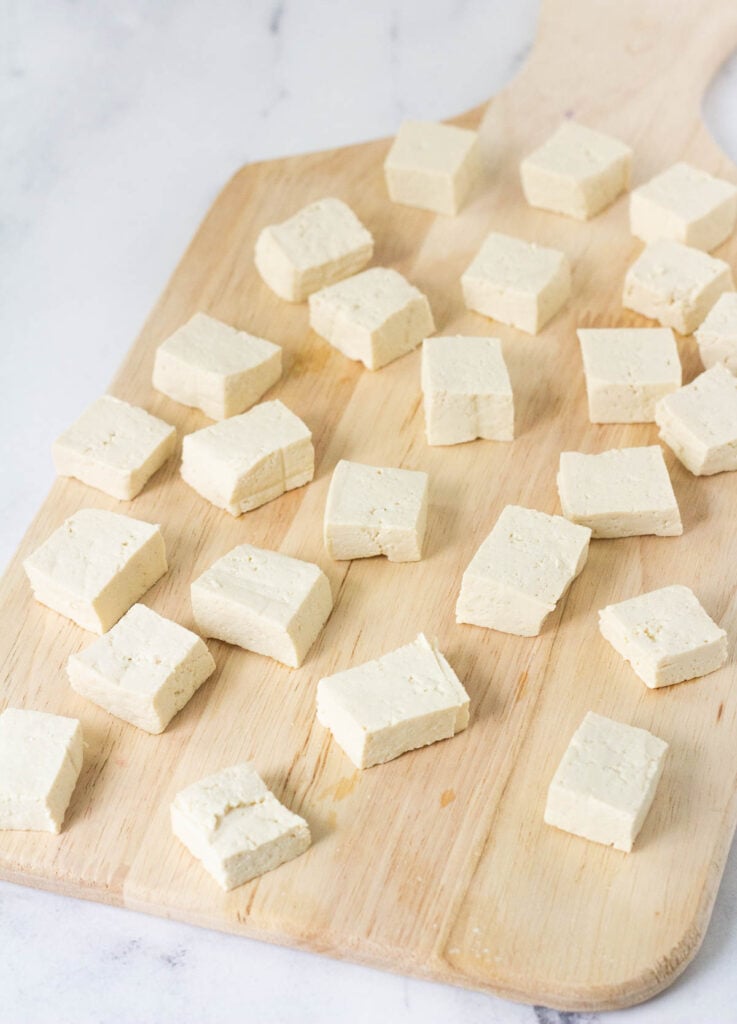
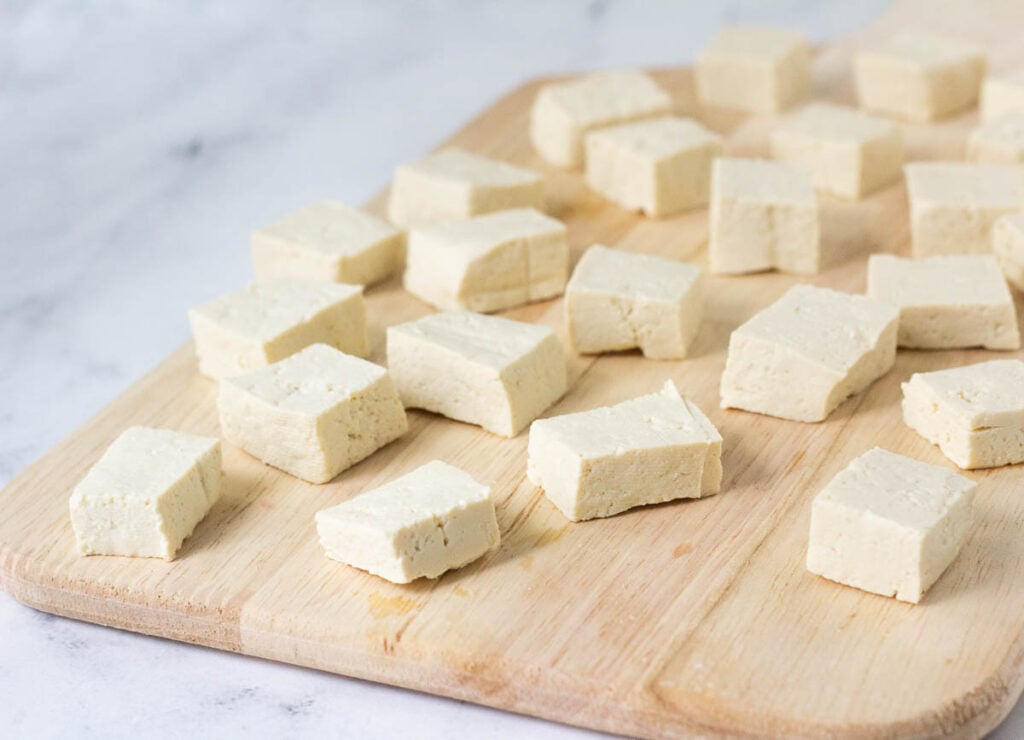
Firm, extra firm, and super firm tofu works best for pressing. It has a firm enough texture to hold its shape.
My default go to tofu for savory recipes is extra firm.
Tools and Equipment You’ll Need
If you’re using the DIY method, you’ll need these simple household items.
- Cutting board
- Kitchen towels or layers of paper towels
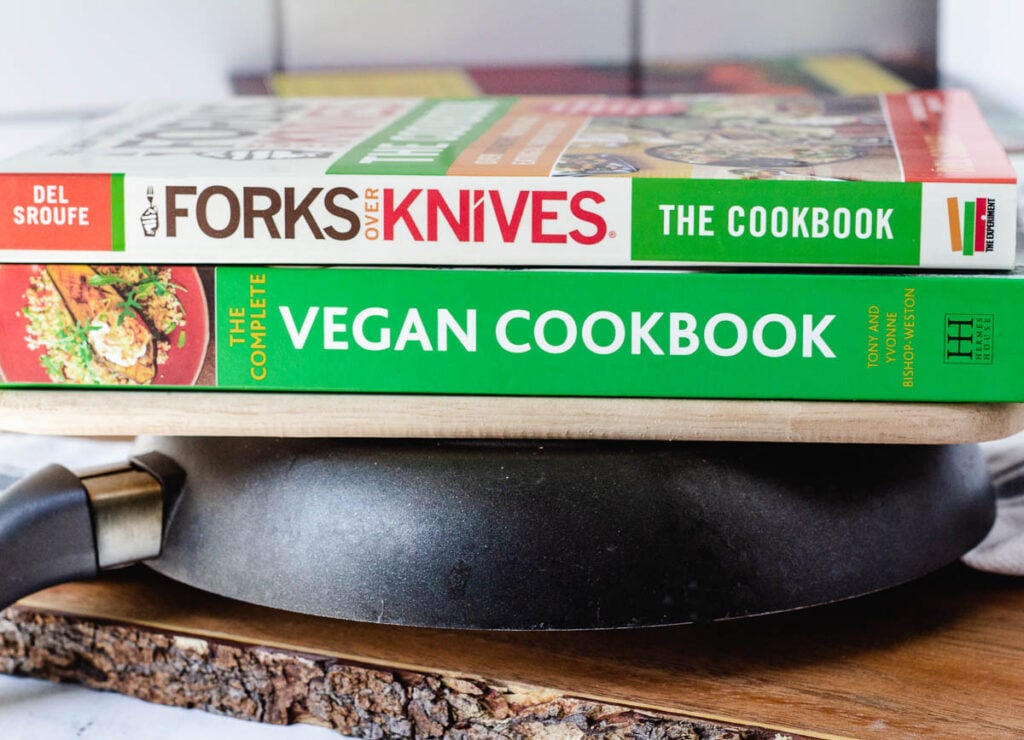
- A heavy pot or pan, or a heavy bowl
- Added weigh in the form of heavy books, or canned goods
Using a tofu press? These are some of my favorites…
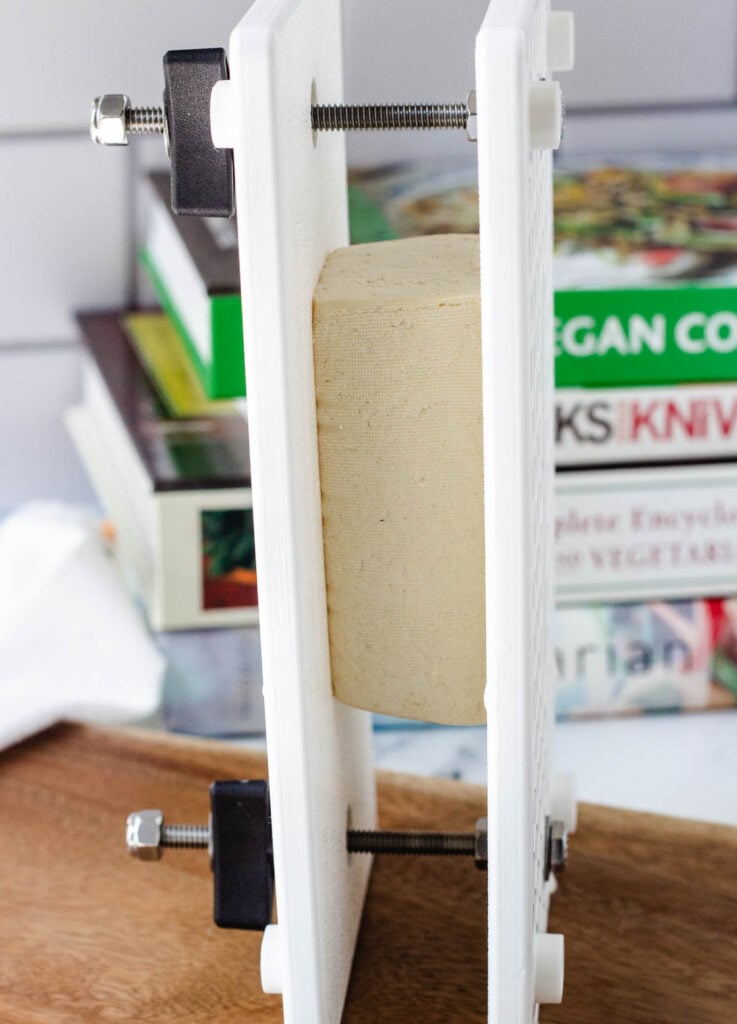
- EZ Tofu Press: Using a screw design, this press features two plastic sides. Insert the tofu in between, and screw the sides together. Tighten the screws every 2-4 minutes. A bit messier and requires more attention than the two below.
- Tofu Bud: Using a spring design, you can set this tofu to press, and won’t need to tighten screws. Just insert the block of tofu into the press, and the work is done for you! It has a pour spout, for easy water clean-up. You can also use the container to marinate your tofu. See my complete review of Tofu Bud!
How do you press tofu?
There are two basic methods to pressing tofu; the DIY method, and using a store bought tofu press. Both result in a firm texture.
Step by Step (DIY Method)
I usually press tofu using this DIY method. It’s easy, doesn’t require any fancy equipment. You may like using this method because it doesn’t cost you anything extra, you don’t need to buy another kitchen gadget, and it takes about the same amount of time as it would using a designated tofu press.
The downside of using this DIY method is that you can sometimes end up with cracked, and unevenly pressed tofu. This is because if your weight isn’t completely even on top of the tofu, one side could end up more pressed than the other, which also causes cracking.
Time Needed: 20-30 minutes
Step 1: Drain the water.
Open your tofu container and drain the excess liquid in the sink. Carefully remove the tofu from the container.
Step 2: Wrap in a clean towel or paper towel.
Using a kitchen cloth towel wrap your tofu covering both the top and the bottom. You can also use several paper towels for easy clean-up. If using paper towels, take two sheets of paper towel, and fold them into quarters, so that the paper towel is about the same size as the block of tofu. I place one set on the top, and one set on the bottom.
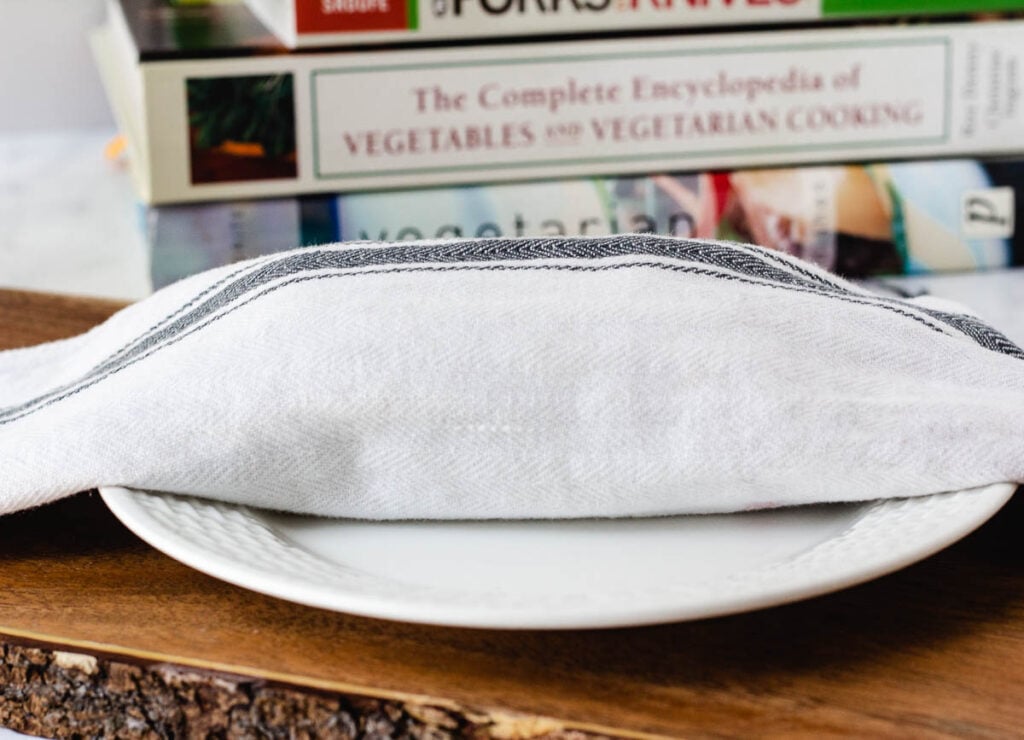
Place the wrapped tofu on a large plate, or cutting board. I prefer using a plate for easy clean-up. That way the plate catches the water.
Step 3: Add weight.
Now that you have your tofu wrapped, and on a flat surface such as a plate or cutting board, it’s time to add some weight. Place a heavy cast iron skillet, or other heavy pan on top of the tofu. Add additional weight if needed. I usually add a couple of full cans of beans on top of the skillet for more weight.
Step 4: Allow time to press.
It will take anywhere from 20-30 minutes to press the tofu. In some cases, you may want to change your kitchen or paper towels, if they have a lot of water. I often change them half way through the press time at about 10-15 minutes.
If you’re short on time, you can press for a shorter amount of time, you will just end up with more water in your tofu.
Step by Step (Using a Tofu Press)
While using the DIY method is simple, and doesn’t require anything extra, there are some benefits of using a tofu press.
- No mess! It’s easier to confine the mess when using a store bought press. Many of the store bought versions have a tray that catches the water, so you don’t need to sop anything up off of your counter.
- No need to do a balancing act! Balancing the skillet, heavy books, or cans on top of the tofu can create a bit of a balancing nightmare. The handle of the skillet knocks it off kilter, and I have definitely had it tip over and crash.
- If using a press you can place it in the refrigerator overnight. This will result in even firmer tofu, and is a great meal prep time saver!
There are many different tofu presses and many of the them work similar but have different features. I recommend reading the instructions for the brand you own.
There are two basic types of presses; screw, and spring.
Directions for screw press:
Time Needed: 20-30 minutes
Step 1: Place the tofu between the two boards.
The screw press requires that you place the tofu between two boards that are held together by two screws on either side.
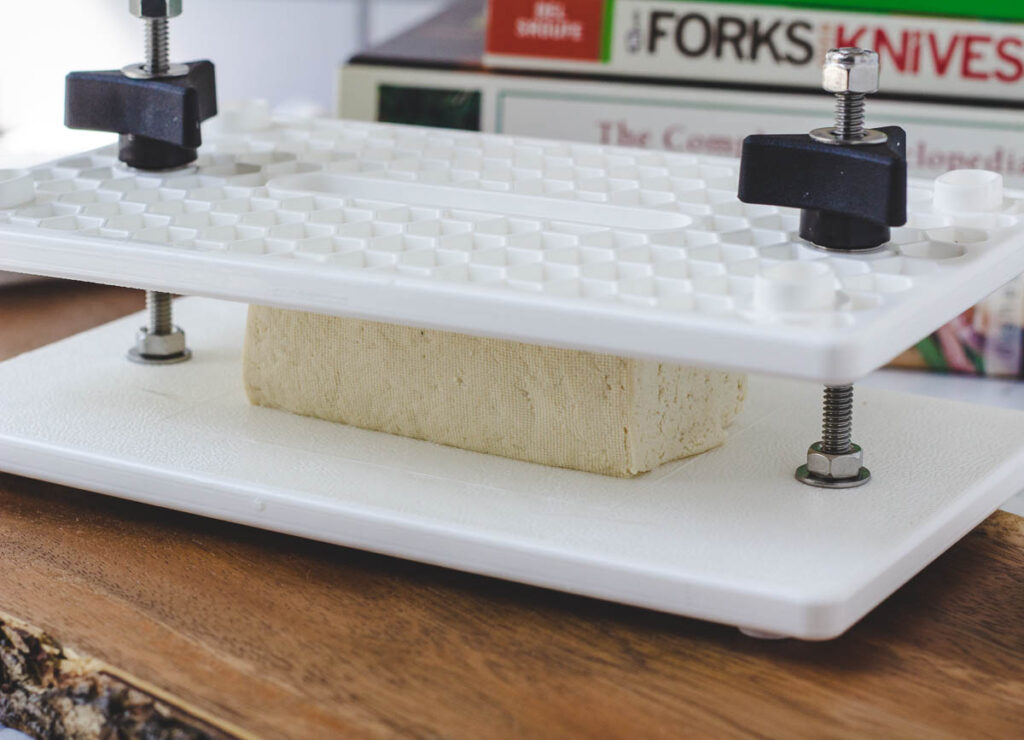
Step 2: Screw the boards together until tofu is firmly in place.
Tighten the screws by hand until the tofu block is firmly in place and does not slip when turned on its side.
Step 3: Turn the tofu press on its side on top of a plate.
This type of press does not have an attached plate to catch the water, so you’ll need to place the press on it’s side on top of a dinner plate.
Step 4: Continue to tighten the screws.
Every two to four minutes, tighten the screws until you’ve reached the 20-30 minute mark or most of the water has been expressed.
Notes:
This method requires that actively engage in the pressing process throughout its duration. I use the time when my tofu is pressing to prep the other elements of my meal such as chopping the vegetables, making the sauce, rice, etc. For this reason, the screw press is not my favorite!
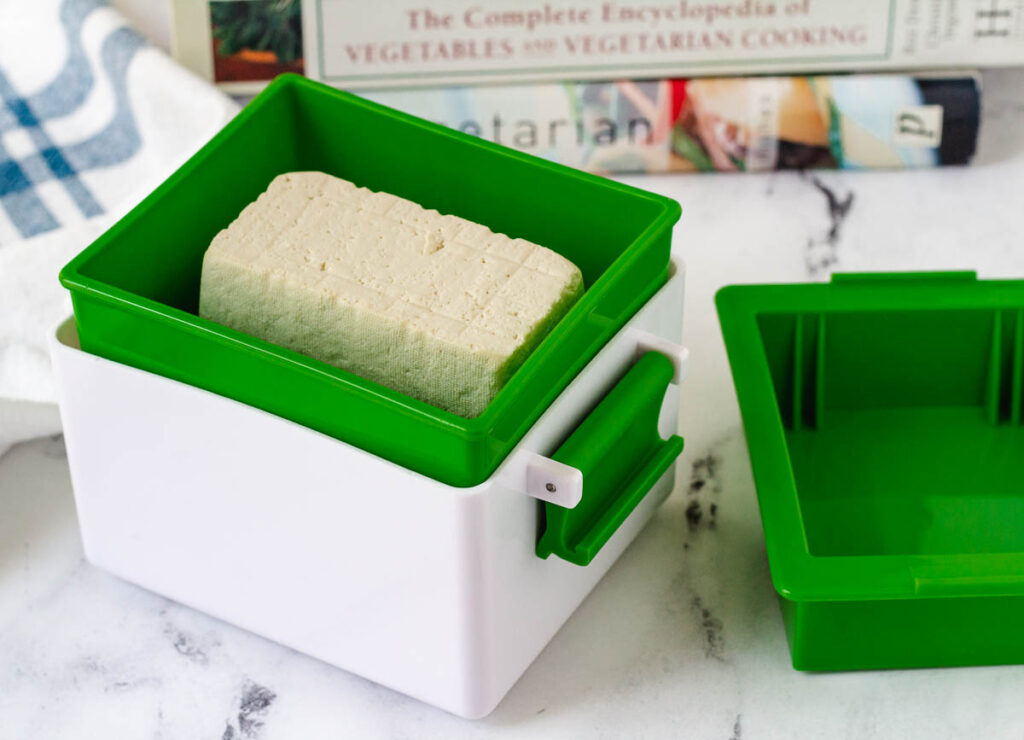
Directions for Spring Press:
A spring press consists of four main parts; a heavy duty spring, a top lid, a middle strainer, and a water catching tray.
Time needed: 20-30 minutes
Step 1: Place the spring inside the water collecting tray.
Depending on your brand there might be a slightly different design. In the Yarkor brand, you place the spring in the center of the water collecting tray.
Step 2: Place the tofu into the middle strainer tray.
Gently place the tofu inside the middle strainer tray. Then place the middle strainer on top of the water collecting tray that contains the spring.
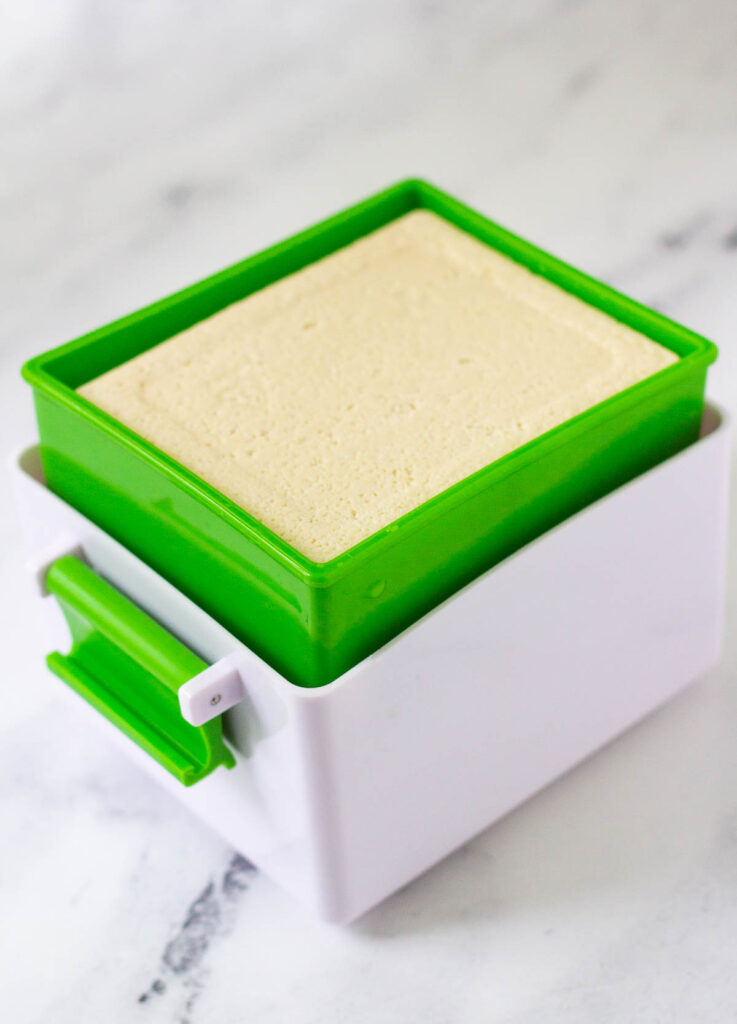
Step 3: Place the top lid on top of the middle strainer and lock.
Push firmly down on the top lid. Use the locks on the side of the container to lock in place.
Step 4: Allow to sit for 20-30 minutes.
Give the tofu time to press. You can place it in the refrigerator overnight, or give it the 20-30 minutes before you prep your meal.
To remove the tofu, unlock the sides, remove the top lid, gently remove the middle strainer, and take out your pressed tofu. Dispose of the water at the bottom of the water tray.
I find using the spring tofu press is the easiest way to get the best texture of the tofu.
Is tofu considered plant-based?
Tofu is vegan and vegetarian. It is made from soy beans, but it is processed to create a large block of bean curd. While it is not exactly a whole food, and requires processing it is still an excellent source of plant protein, and cholesterol free. It is higher in fat than some other sources of plant protein such as lentils and beans. Some plant-based nutritionists recommend eating tofu in moderation.
I enjoy tofu 1-2 times a week. Also because I don’t want to consume too much soy in general.
Tofu FAQS
The simple way to drain tofu is to pull back the plastic top just at the edge. Over the sink, slowly tip the tofu so that the water comes out but the whole tofu block stays in the container and does not fall out.
Another method I use is to cut a slit on top of edge of the plastic top, tip over the sink, and allow the water to drain out the small slit.
Depending on the type of tofu you are pressing you will need anywhere from 20-30 minutes. You can even press tofu overnight in the refrigerator, and have it ready the next day. You can’t over press tofu, but you can under press tofu. The longer amount of time you give the tofu to press the more firm the texture will be.
Best Pressed Tofu Recipes
There are so many delicious ways to use pressed tofu! Once it is pressed and firm you can add tons of flavor to your healthy recipes!
- Make tofu crumbles! I create a vegan chorizo that’s delicious in chilis, tacos, and burrito bowls!
- Add to your favorite vegan curries and stir-fries!
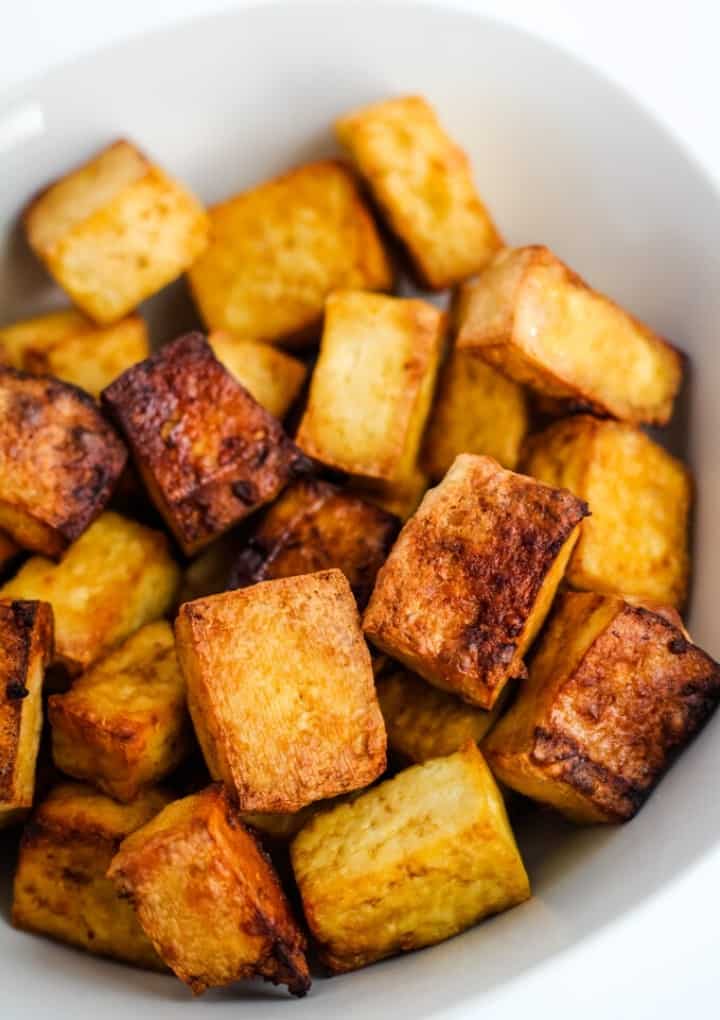
- Marinate the cubes, and add them to the air fryer for super crispy bites!
- Make vegan kebab skewers and grill in the summertime!
- Finely chop and add to salads, buddha bowls, or even make a vegan egg salad sandwich!
- Make a tofu scramble breakfast!
If you’ve used this how to tutorial, comment below and let me know how it went. You can also follow me on Facebook, Instagram, and Pinterest for more vegan plant-based family recipes your whole family will enjoy!
Leave a Reply