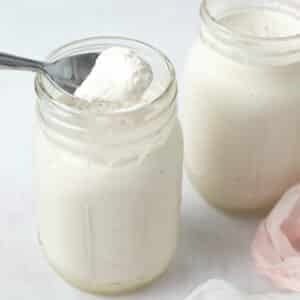
A lusciously creamy yogurt alternative, this homemade almond milk yogurt is vegan and incredibly easy to make! It’s silky-smooth and tangy, perfect for breakfast snacks or as a versatile ingredient in various dishes.

Save This Recipe
Jump to:
- 📝 Notes for Getting Started
- 💗 Why You’ll Love This Homemade Almond Milk Yogurt
- 🥣 Ingredients and Note
- 📖 Substitutions
- 🛠 Tools and Equipment
- 👩🏻🍳 How to Make Homemade Almond Milk Yogurt
- 🌡 How to Check the Temperature of the Milk Without a Thermometer
- 🧐 How to Incubate Yogurt Without an Instant Pot
- 🫙 How to Store and Keep
- ❓ FAQS
- 📋 Expert Tips
- 🍽 How to Serve
- 😋 More Vegan Yogurt Recipes!
- ⚖️ Serving Size
- Recipe
Do you miss the convenience and taste of yogurt since you’ve become vegan? Or are you dairy-free, and the store-bought yogurt alternatives aren’t cutting it? I hear you! I have tried numerous dairy-free yogurts from the grocery store, only to be disappointed every time. Some are too watery! Some are way too sweet! Others don’t have that tangy flavor that is characteristic of yogurt.
I have good news for you! Making your almond milk yogurt at home is much easier than you think and way more cost-effective, too! You won’t be disappointed with this plain, unsweetened version’s tangy flavor, silky smooth texture, and versatile uses.
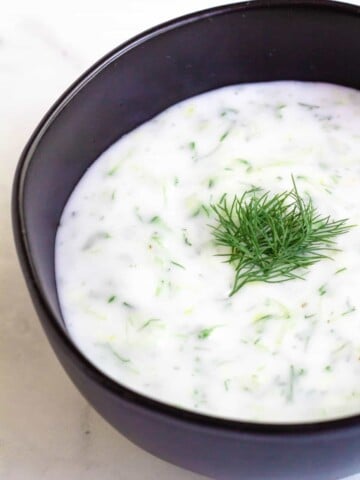
Fancy it up with your favorite mix-ins or sweeteners. Use it to make a homemade vegan tzatziki sauce, or add it to your favorite smoothies. The options are endless! This recipe is sure to be added to your weekly meal prep rotation.
📝 Notes for Getting Started
Before we get started, you should know a few things.
Sterilize Your Tools: Yogurt relies on the growth of specific beneficial bacteria (lactic acid bacteria) to ferment the milk and create yogurt. When you sterilize your tools and equipment, you eliminate any potentially harmful bacteria that could interfere with the yogurt culture. This ensures that the beneficial bacteria you introduce will have a clean environment to thrive and convert the milk into yogurt.
You Need a Thickener: Unlike dairy yogurt, plant-milk yogurts do not thicken with the yogurt starter alone. They need some thickener to achieve the best consistency. Many options include cornstarch, tapioca starch, agar powder, or arrowroot powder. While I use cornstarch in this recipe, you can use the thickener that you have on hand.
You Need a Yogurt Starter: Not all yogurt starters are vegan. There are two brands of yogurt starters that I particularly like: Cultures for Health and Belle + Bella. Another option is to use a powdered vegan probiotic capsule.
💗 Why You’ll Love This Homemade Almond Milk Yogurt
Natural and Wholesome Ingredients: Many store-bought yogurts have additives that are not as wholesome and nutritious. Making your yogurt at home means you have complete control over your ingredients.
Thick and Tangy: Unlike many store-bought vegan yogurts, this homemade vegan almond milk yogurt has a thick consistency and a rich tang.
Customizable: Adjust the cooking time to change the level of tanginess. Add a sweetener, or leave it out. Add a thickener, or not. Then enjoy this yogurt with your favorite toppings!
Allergy-Friendly: This recipe is dairy-free, soy-free, and gluten-free. However, it is not for you if you have a tree nut allergy.
🥣 Ingredients and Note
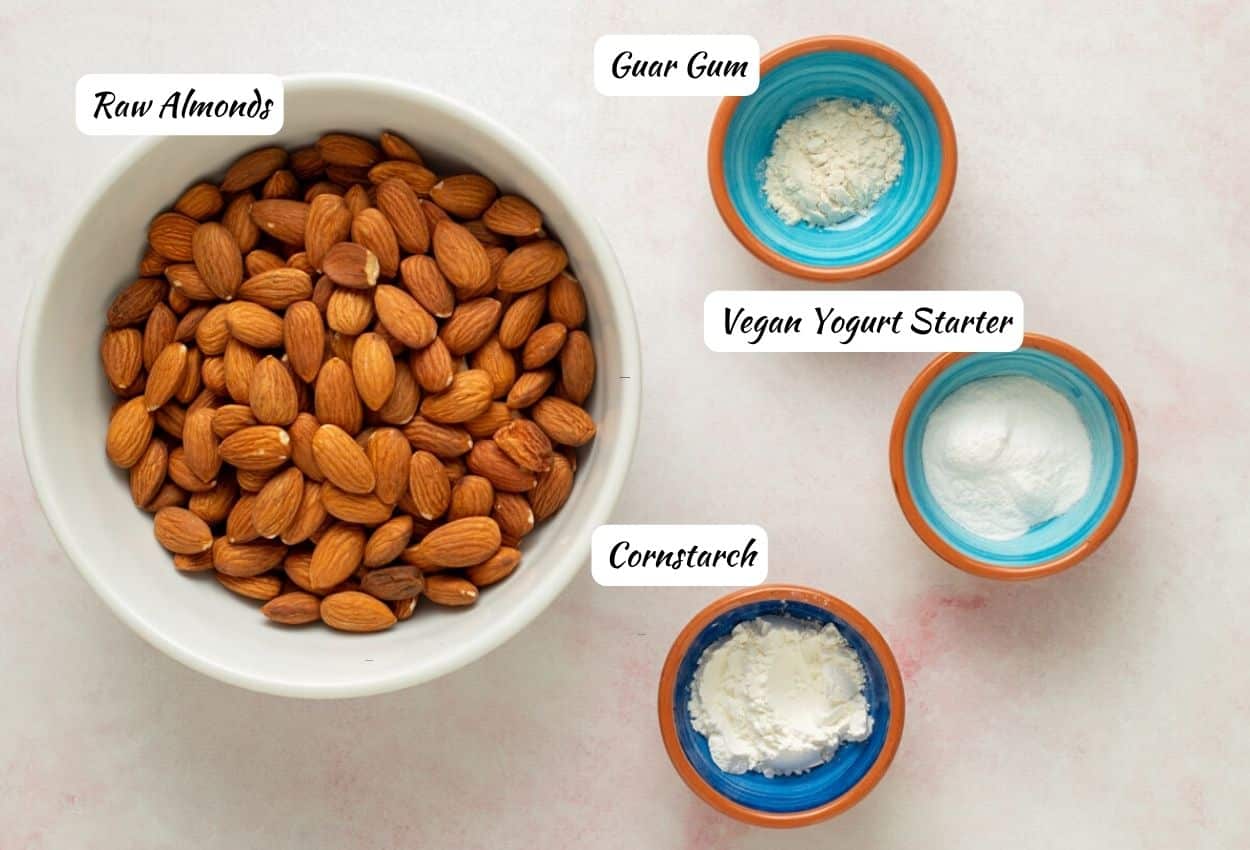
Raw Almonds: Use raw shelled almonds. No added salt.
Water: Used to combine with the almonds to create almond milk.
Probiotic Capsules or Vegan Yogurt Starter: You will want to have at least 40 billion live active cultures for each batch. If you opt for a probiotic capsule, you may need one or more depending on the strain. You must use a probiotic that has L-acidophilus and B-lactus. If using a vegan yogurt starter, it will include everything that is needed.
Cornstarch: Used to thicken the yogurt. You could also use tapioca starch or arrowroot powder.
Guar Gum: Used with the cornstarch to help thicken the yogurt.
Maple Syrup (optional): Only add if you want a sweetened yogurt.
📖 Substitutions
Alternative Thickeners: The result of your yogurt will depend a lot on the thickener you choose. Arrowroot powder and agar agar work very well.
Capsules vs. Vegan Yogurt Starter: If you have vegan probiotic capsules that you take daily, which come in powdered form, then you can use that to create your yogurt instead of the vegan yogurt starter. A yogurt starter is simple if you don’t have probiotics readily available because it has all the necessary strains to create a nutrient-rich yogurt.
🛠 Tools and Equipment
Before starting this project, you must clean and sanitize all your tools. If they are not properly sanitized, you risk the growth of unwanted bacteria that can cause sickness.
High-Speed Blender: Used to blend the almonds and water to make the almond milk.
Nut Milk Bag: Used to strain the blended almonds and water to create the almond milk.
Instant Pot: This is the simplest way to make your yogurt if you have an instant pot with the yogurt function. If you don’t have an instant pot, no problem. You can use a heavy pot instead.
Glass Pint Jars with Lids: This is what you will use to place the yogurt mixture in and allow it to heat to create yogurt.
Whisk and Thermometer: I particularly like this whisk for making yogurt because it has a thermometer attached!
👩🏻🍳 How to Make Homemade Almond Milk Yogurt
Preparing Utensils and Making Almond Milk
- Before you get started, sterilize all of your tools and utensils. To do this, wash them with hot water and soap. Then, put them in the oven at 160° F for 10 minutes. You can also put them in the dishwasher if they are dishwasher-safe. Sterilize your pot, mixing bowl, utensils, glass jars, and whisk.
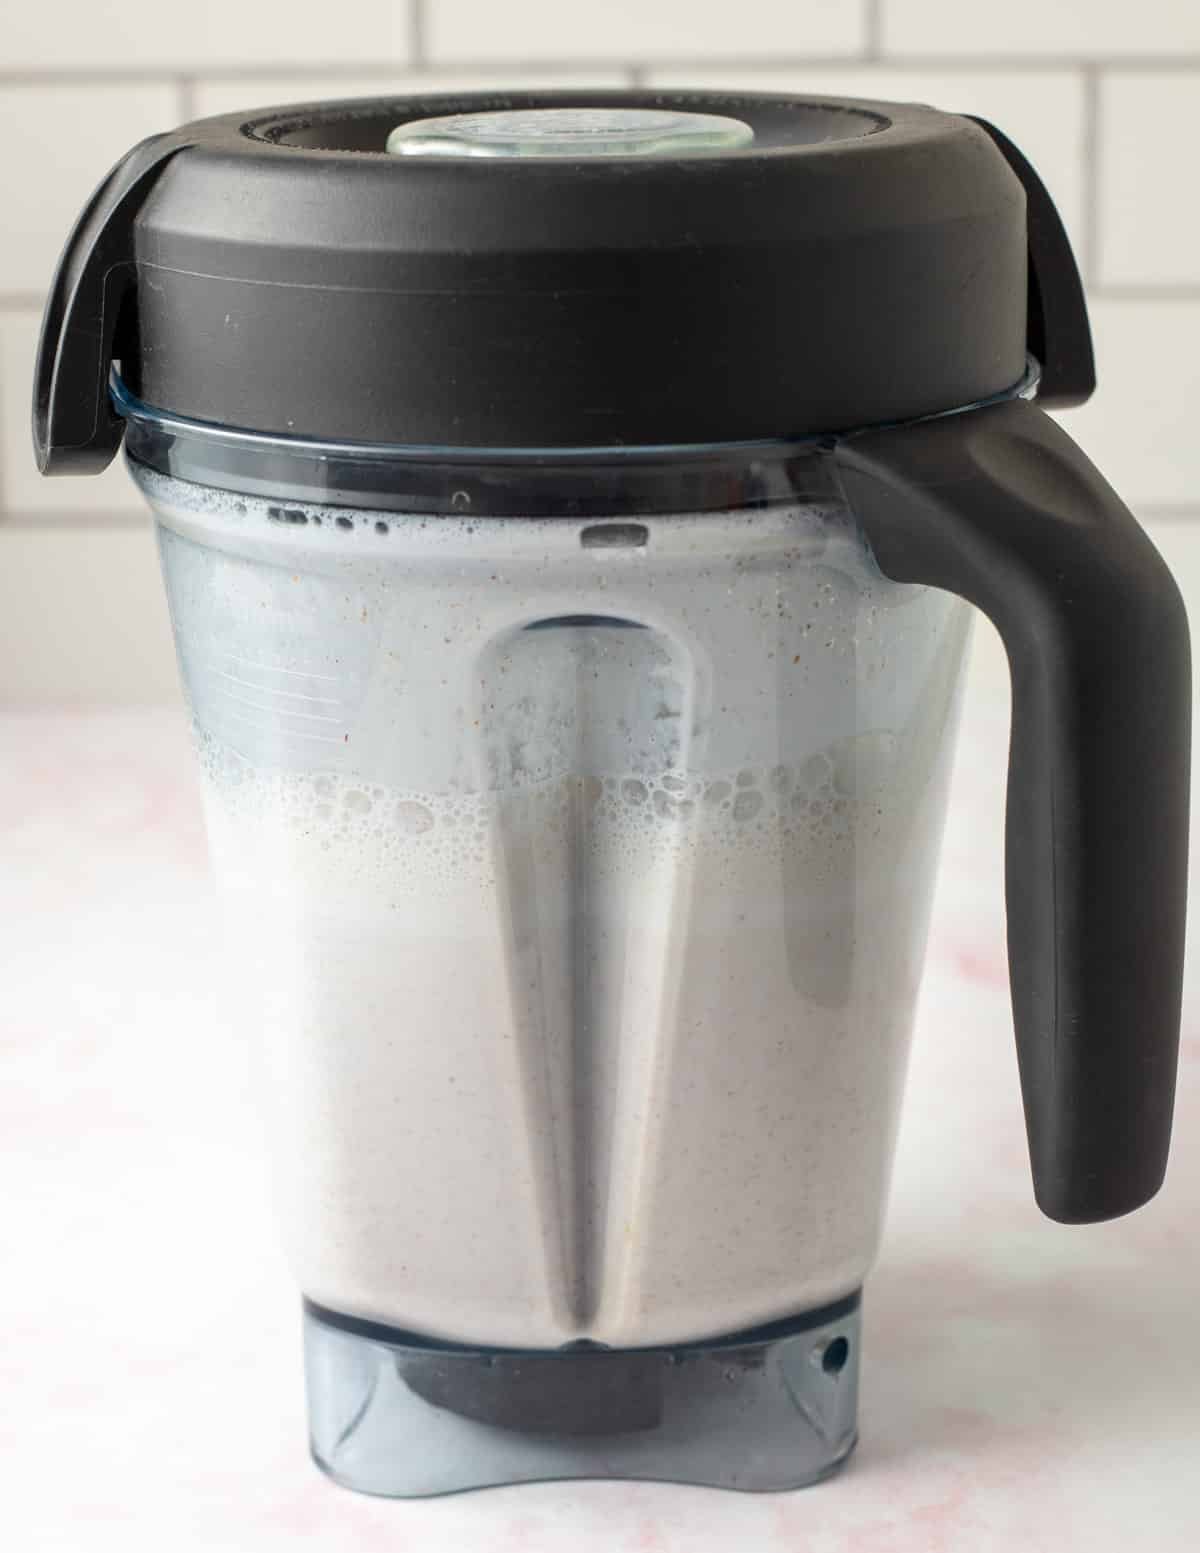
- Place the almonds and the water in a high-speed blender. Blend until thoroughly combined and smooth, about 30-40 seconds.

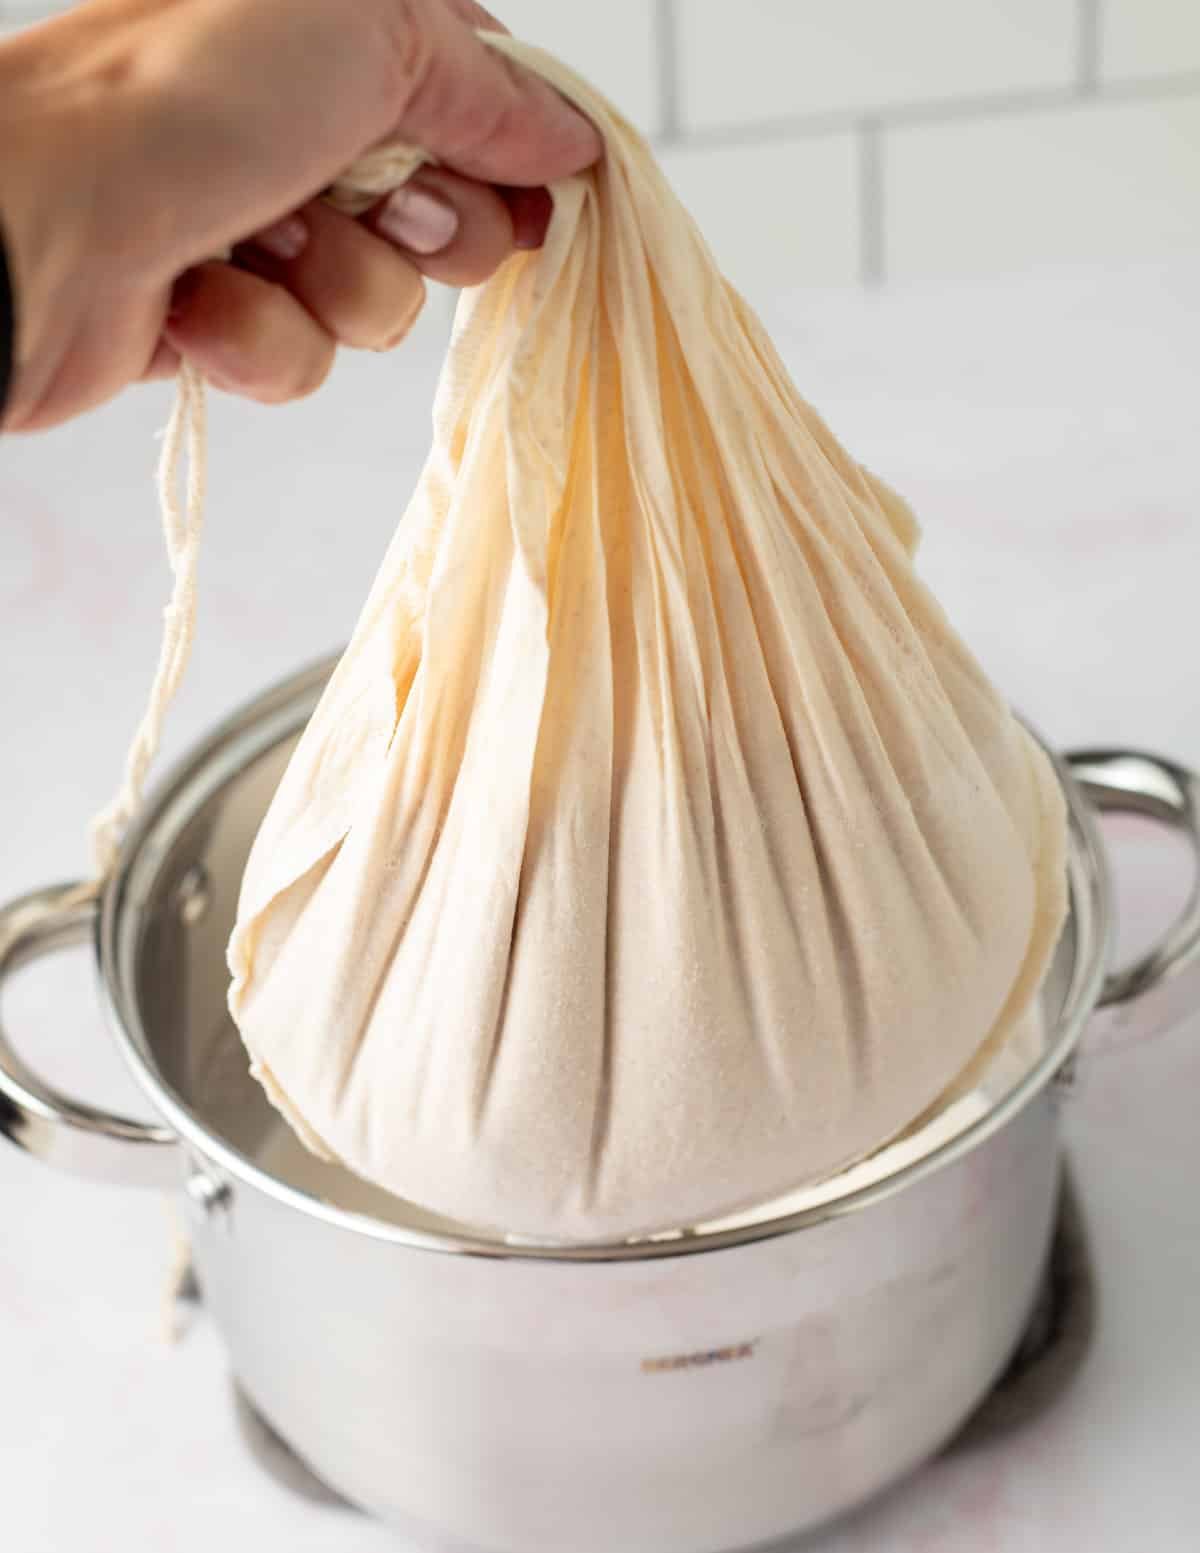
- Using a nut milk bag, strain the blended almonds and water into a sterilized stainless steel
saucepan . You mustn’t use asaucepan with a Teflon coating. Squeeze as much liquid as you can. Set the pulp aside to use for another recipe.
Heating the Almond Milk
- Place the
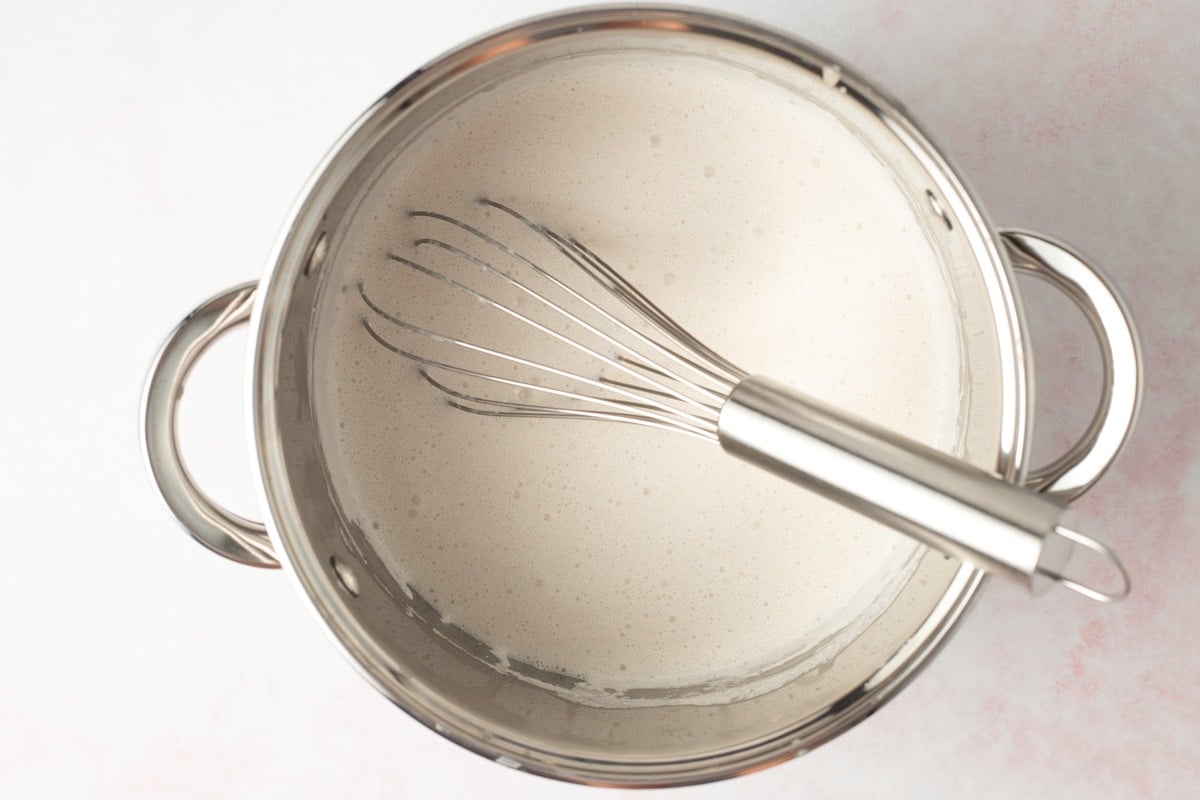
saucepan with the almond milk over medium heat. Add the cornstarch and guar gum. Give it a good whisk to combine all of the ingredients. Allow the almond milk to warm slowly over low-medium heat to 185° F. It could take about 30 minutes to reach the desired temperature.
- Once it reaches 185°F, remove the pot from the heat and whisk consistently for 2 minutes. Don’t skip this step. It helps kill any unwanted bacteria and thickens the almond milk.
Allow to Cool
- Remove the pot from the heat and allow it to cool until it reaches a temperature of 100° F. Periodically whisk the mixture to help keep it smooth. It could take up to 40 minutes to cool.
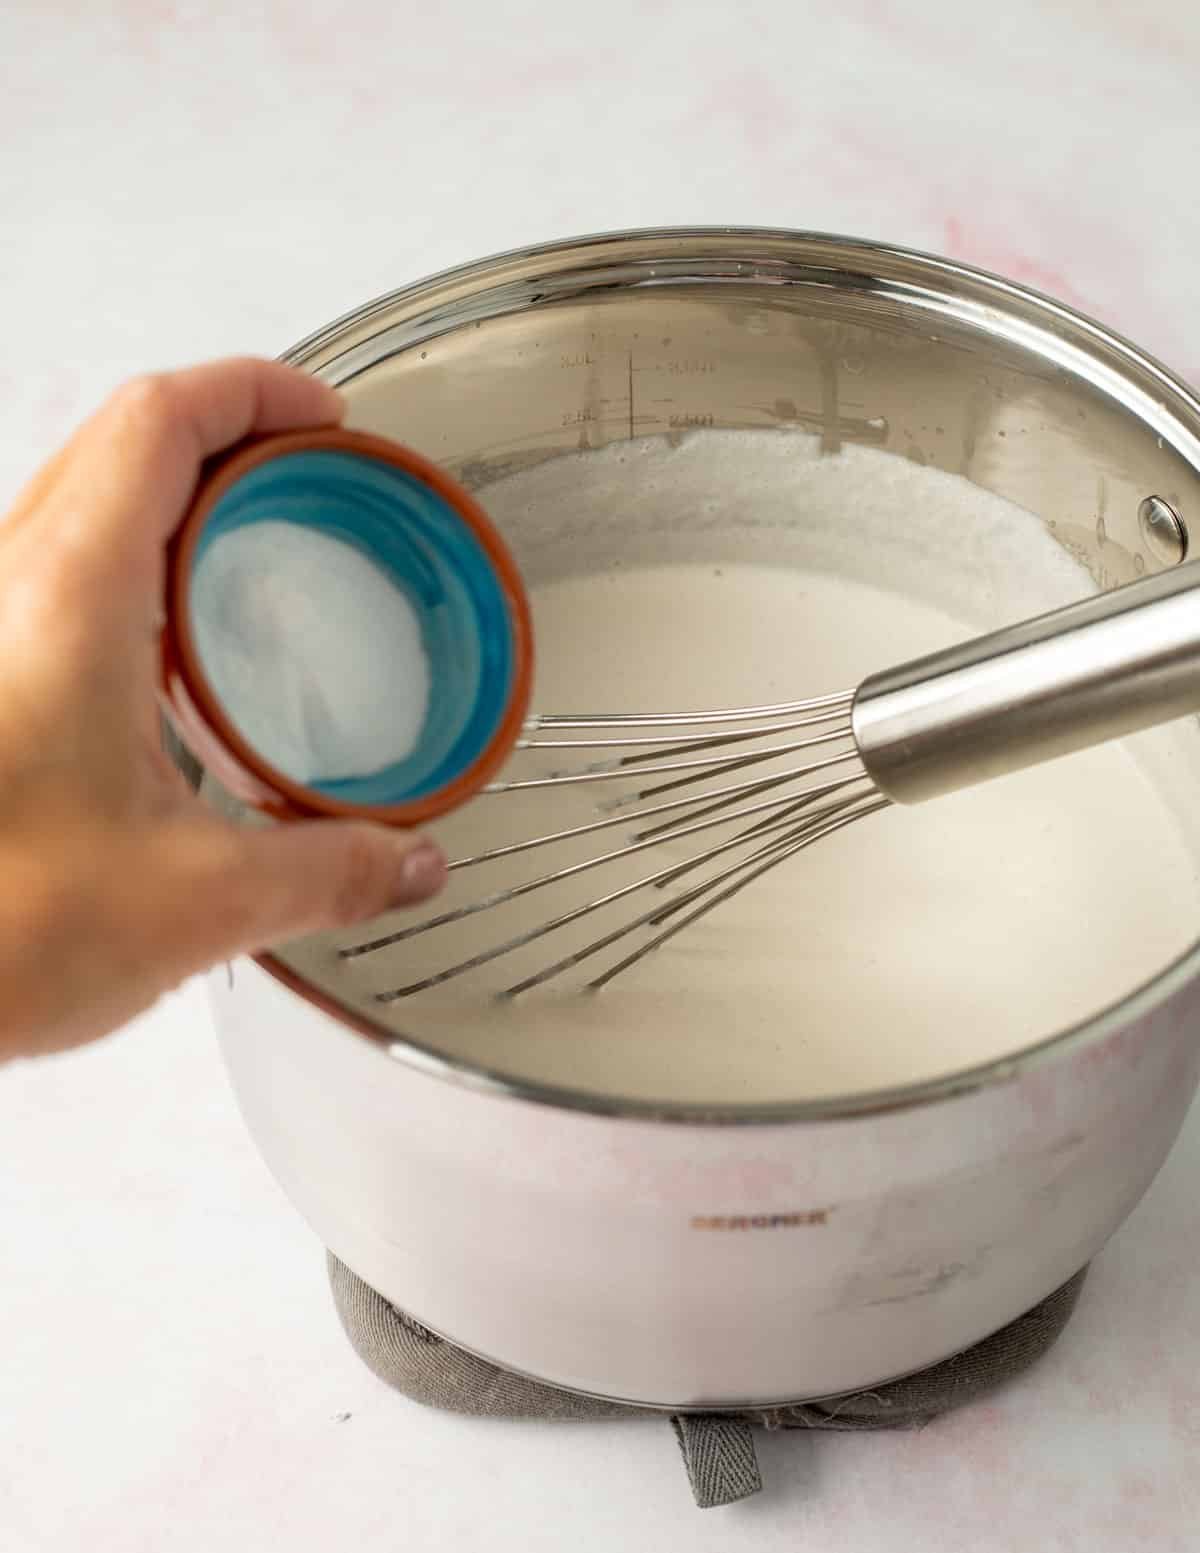
- Once the mixture is cool, it is safe to add the yogurt starter. Whisk in the powder until it is combined.
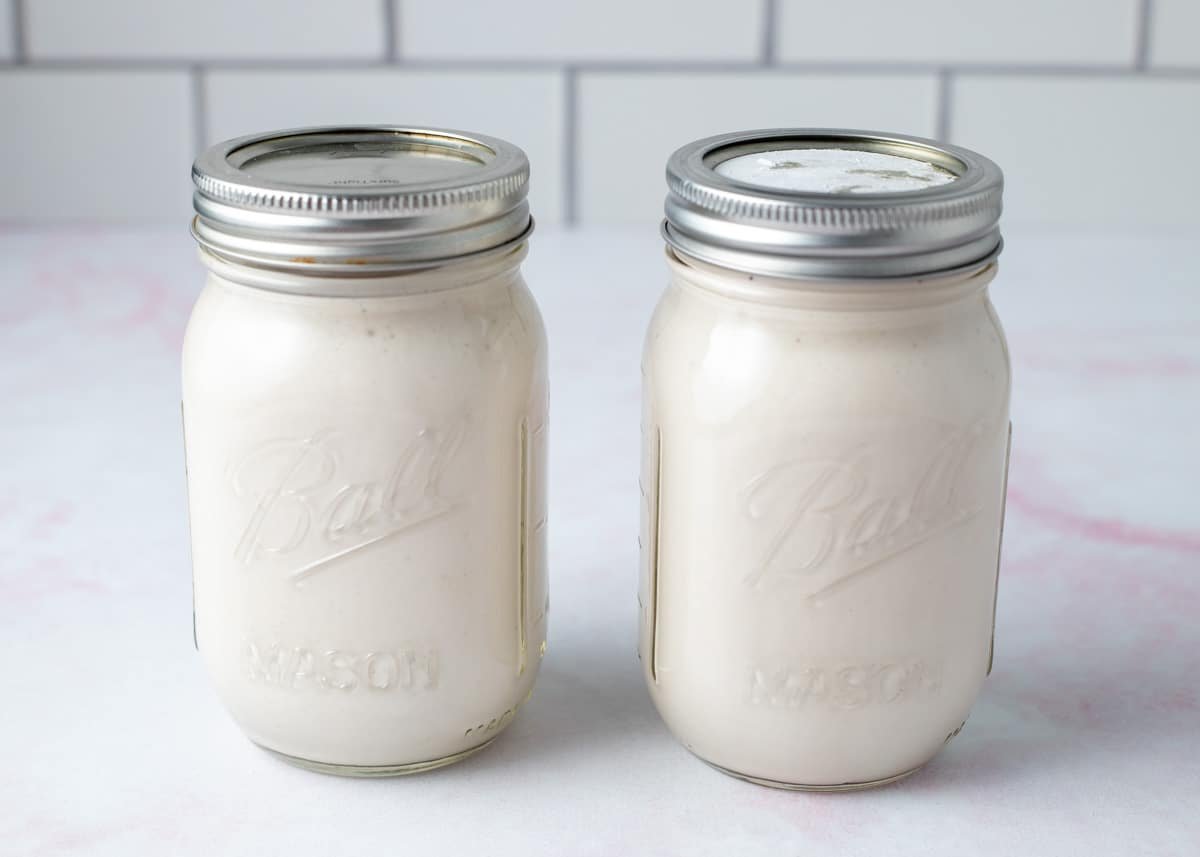
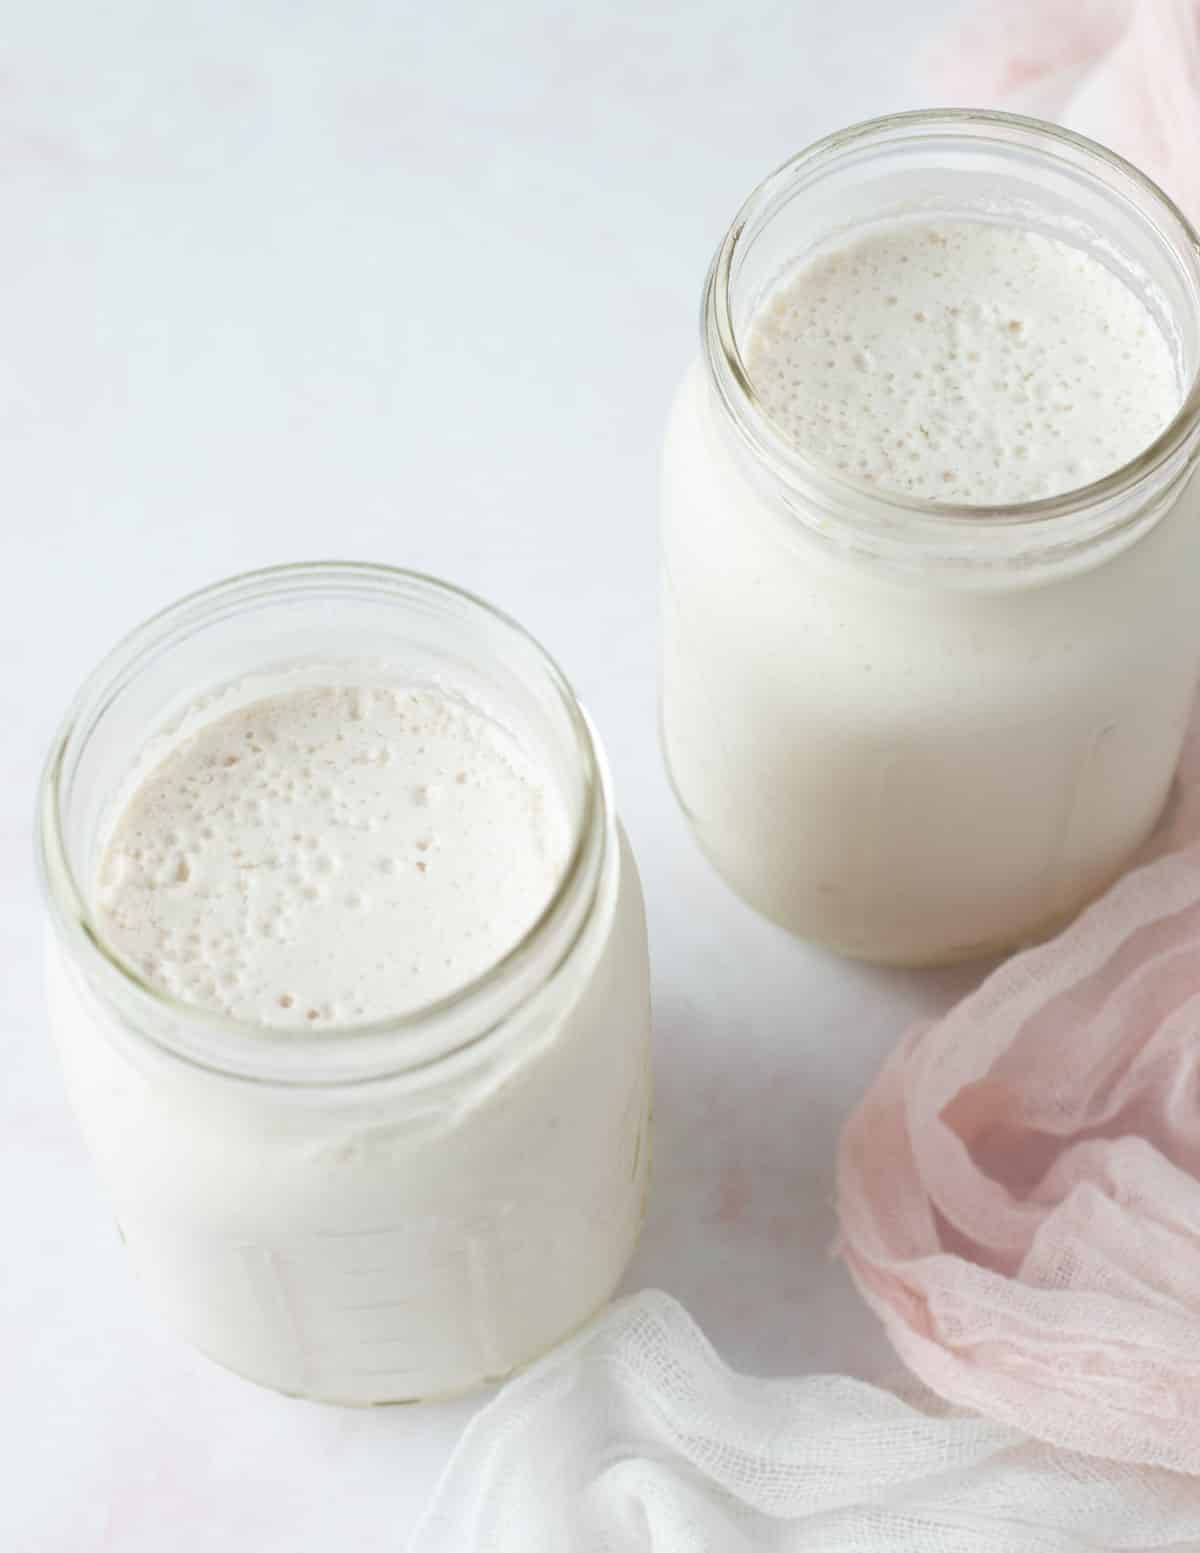
- Pour the mixture into two glass jars that have been sanitized. Leave some room at the top of the jars so the yogurt doesn’t come into contact with the metal lid. Use two-pint jars or one large quart jar.

Activating the Probiotics
- Place the jars in your Instant Pot. You do not need to add any water. Secure the Instant Pot lid and seal the vent. Press the Yogurt function and adjust the time of incubation. You will need at least 10 hours for less tangy yogurt and up to 14 hours for very tangy yogurt. I like the middle ground at 12 hours. Allow the Instant Pot to do its thing. Don’t bump or disturb it during this process.
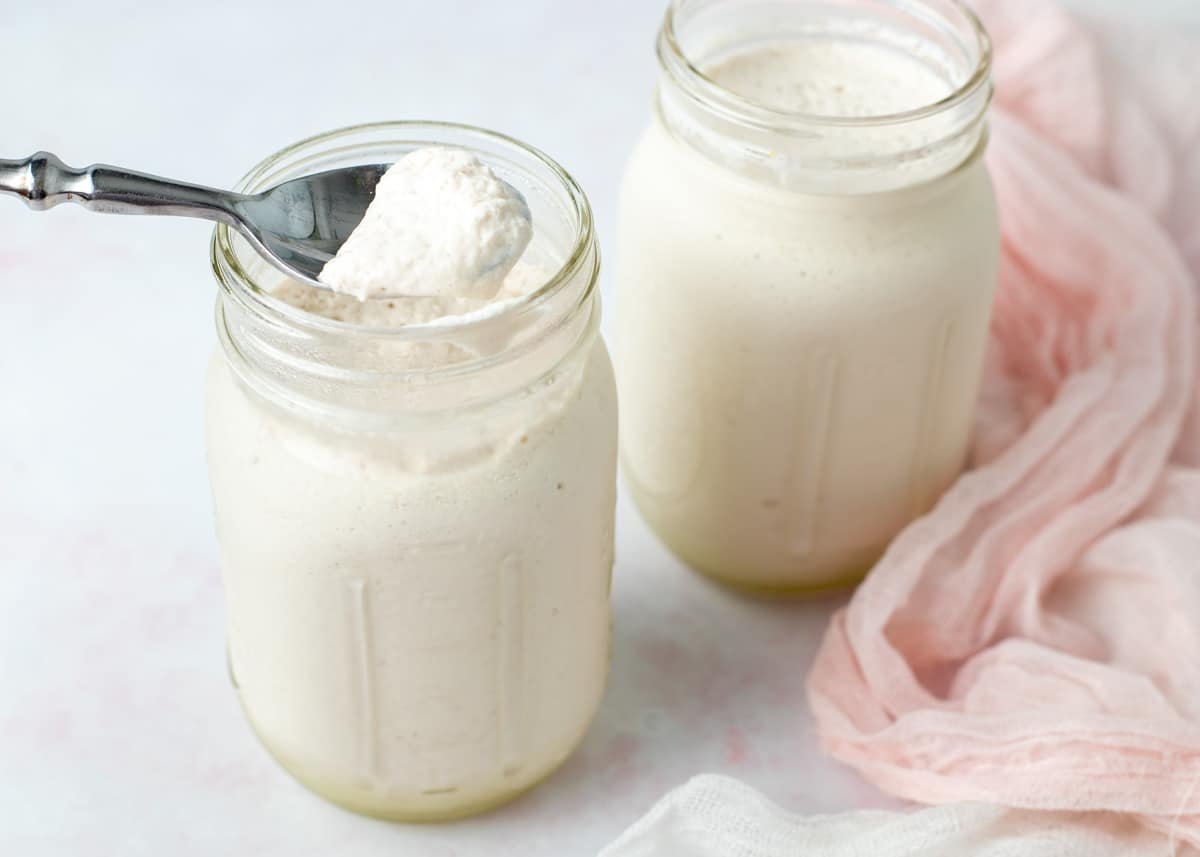
- Once the timer beeps, remove the jars from the Instant Pot and allow them to cool at room temperature. Then, transfer them to the refrigerator for another 6 hours.
🌡 How to Check the Temperature of the Milk Without a Thermometer
Wash your hands with soap and water. Then, dip a clean finger to test the temperature. If it’s too hot to touch comfortably, it’s probably over 120°F, hotter than you need. If it’s warm but not uncomfortably so, it’s likely in the proper temperature range (around 100°F).
🧐 How to Incubate Yogurt Without an Instant Pot
Place the jars in a large pot, wrapping the jars with thick towels to help maintain a stable temperature. Make sure it’s well-insulated. Place the pot in a warm and draft-free location. You can put it in an oven (turned off), a microwave (not turned on), or simply on a countertop. The goal is to maintain the temperature for several hours.
🫙 How to Store and Keep
The yogurt will keep in the fridge for up to 7 days. As the yogurt sits, some water may separate. Give it a good stir before serving.
❓ FAQS
Almond milk yogurt is typically lower in calories and saturated fat than dairy yogurt. It is also naturally cholesterol-free. Additionally, it provides vitamins and minerals, such as vitamin E, calcium (if fortified), and vitamin D (if fortified).
This almond milk yogurt contains probiotics, just like traditional dairy yogurt. Probiotics are beneficial bacteria that can positively impact gut health and digestion.
An average serving (1 cup) contains about 2-5 grams of protein. Mix protein-rich plant sources such as pumpkin seeds, chia seeds, and chopped nuts into your yogurt to increase the protein.
If the yogurt has a pink tinge, this is a clue that it may have been contaminated with unwanted bacteria. If this happens, it is not safe to consume the yogurt.
📋 Expert Tips
- Don’t skip the sterilization step! Ensuring that the yogurt is not contaminated with unwanted bacteria is essential.
- Be sure to follow all of the steps for heating the almond milk. It is essential for killing unwanted bacteria.
- Only use sterilized utensils when stirring the almond milk mixture. Avoid using contaminated spoons or putting your finger in the mixture.
- If using a whisk, keep the whisk in the pot. Removing it can contaminate the utensil from unwanted bacteria on the countertop.
- When adding the vegan yogurt starter, do so in a cool place where it won’t be disturbed, and try to keep it away from air dust and potential kitchen mold spores.
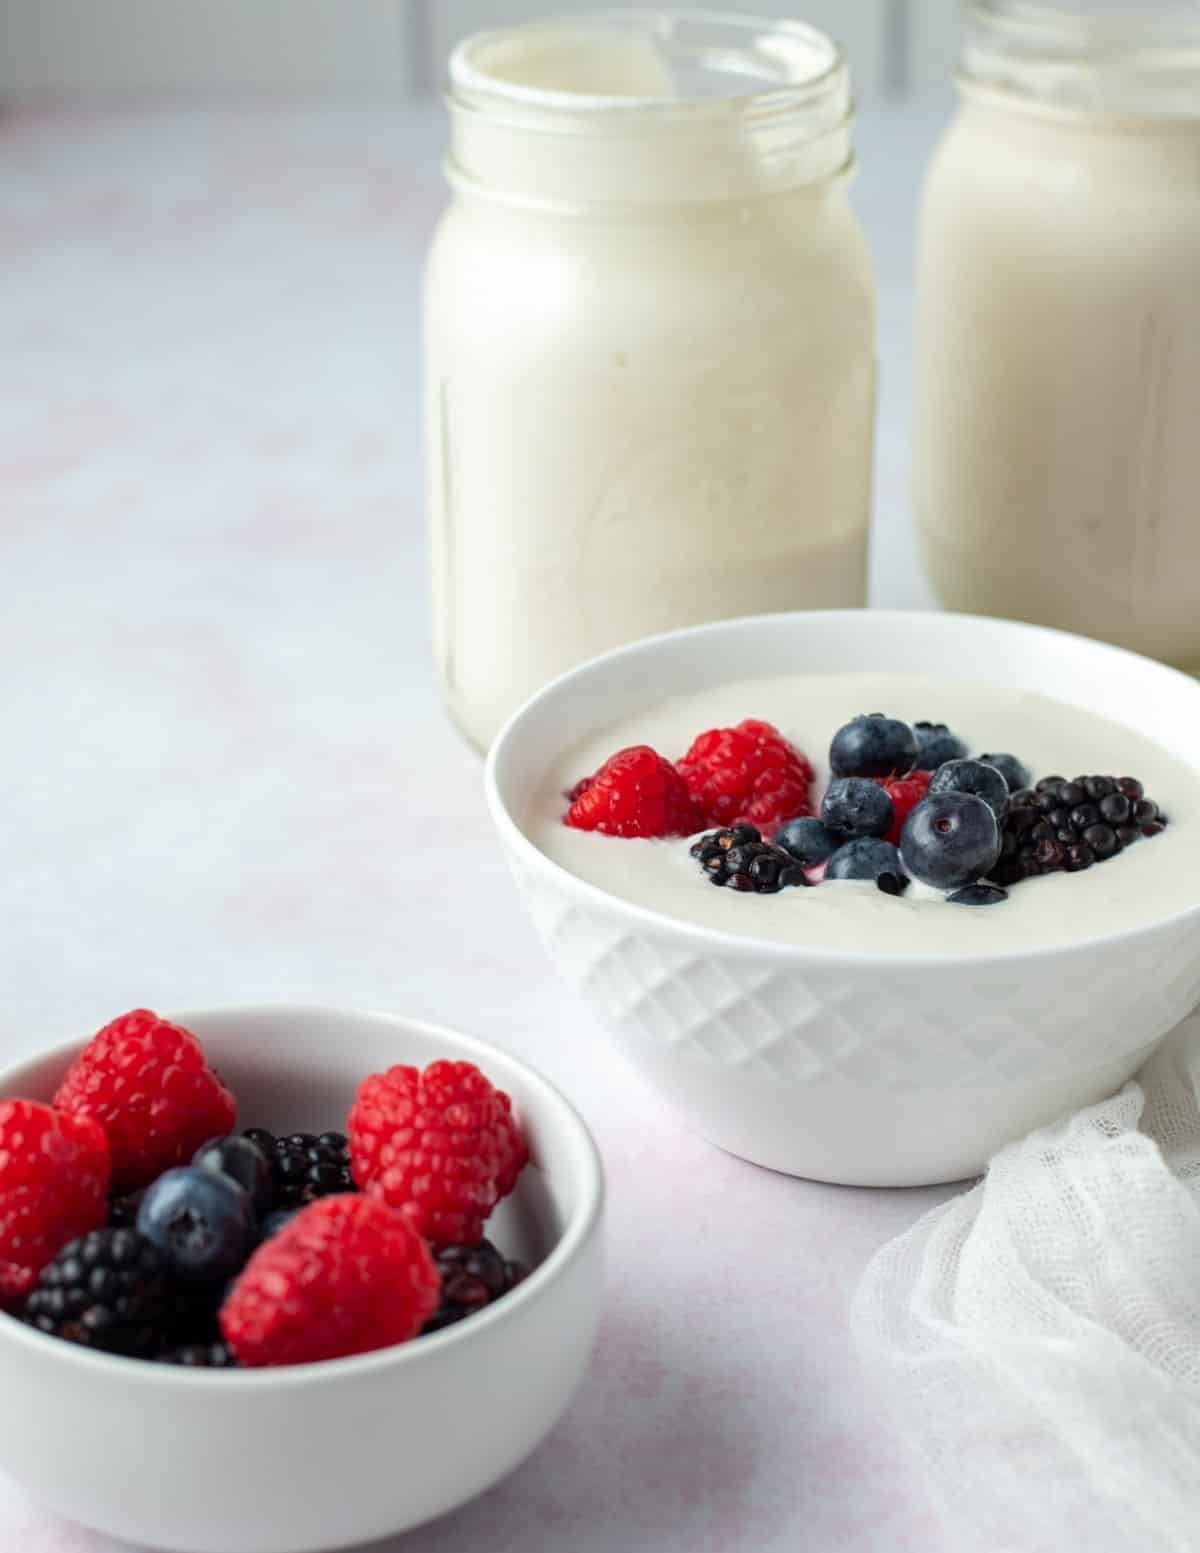
🍽 How to Serve
Plain with Fresh Fruit: Top with fresh berries, sliced bananas, kiwi, or any of your favorite fruits. Add a drizzle of honey or maple syrup for extra sweetness if desired.
Granola Parfait: Layer homemade almond yogurt with granola and various fruits to create a delicious parfait. You can also sprinkle nuts or seeds for added crunch.
Smoothie Bowl: Blend this homemade yogurt with your favorite fruits and a handful of spinach or kale to make a creamy and nutritious smoothie bowl. For texture and flavor, top it with more fruits, nuts, seeds, and granola.
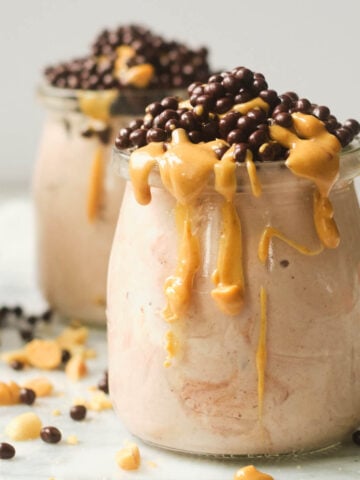
Nut Butter: Swirl nut butter into your yogurt for added creaminess and flavor. You can also add a dollop of jam or berry compote for sweetness.
Dips: Create creamy dips for vegetables or pita chips by adding herbs, garlic, lemon juice, and spices.
Savory Dishes: As a dairy-free alternative in savory dishes, like curries, soups, or sauces.
😋 More Vegan Yogurt Recipes!
⚖️ Serving Size
This homemade almond milk yogurt recipe makes four servings that are 6 ounces each. In total, it makes 24 ounces.
Recipe
Homemade Almond Milk Yogurt (Vegan)
Save This Recipe
Ingredients
- 1 ½ cups raw almonds
- 4 cups water
- 2 ½ teaspoon cornstarch
- ½ teaspoon guar gum or xanthan gum
- 1 packet vegan yogurt starter
Alternative Thickener
- 1 ½ teaspoon arrowroot powder instead of cornstarch
- 1 ½ tsp agar agar instead of guar gum
Instructions
Preparing Utensils and Making Almond Milk
- Before you get started, sterilize all of your tools and utensils. To do this, wash them with hot water and soap. Then, put them in the oven at 160° F for 10 minutes. You can also put them in the dishwasher if they are dishwasher-safe. Sterilize your pot, mixing bowl, utensils, glass jars, and whisk.
- Place the almonds and the water in a high-speed blender. Blender until thoroughly combined and smooth, about 30-40 seconds.
- Using a nut milk bag, strain the blended almonds and water into a sterilized stainless steel saucepan. It's important that you not use a saucepan with a Teflon coating. Squeeze as much liquid as you can. Set the pulp aside to use for another recipe.
Heating the Almond Milk
- Place the saucepan with the almond milk over medium-low heat. Add the cornstarch and guar gum. Give it a good whisk to combine all of the ingredients.
- Allow the milk to slowly come to a temperature of 185°F, careful not to scald it in the heating process. This could take anywhere from 30 to 40 minutes.
- Once the almond milk reaches a temperature of 185° F remove the pot from the heat, whisking consistently for 2 minutes. Don't skip this step. It helps to kill any unwanted bacteria and helps to thicken the almond milk.
Allow to Cool
- Remove the pot from the heat and allow it to cool until it reaches a temperature of 100° F. Use a cooking thermometer if possible. Periodically whisk the mixture to help keep it smooth. Cooling could take anywhere from 30-40 minutes.
- Once the mixture is cool, it is safe to add the yogurt starter. Whisk in the powder until it is combined.
- Pour the mixture into two glass jars that have been sanitized. Leave some room at the top of the jars so that the yogurt doesn't come into contact with the metal lid. Use two-pint jars or one large quart jar.
Activate the Probiotics
- Place the jars in your Instant Pot. You do not need to add any water. Secure the Instant Pot lid and seal the vent. Press the Yogurt function and adjust the time. You will need at least 10 hours for less tangy yogurt and up to 14 hours for very tangy yogurt. I like the middle ground at 12 hours.
- Allow the Instant Pot to do its thing. Don't bump or disturb it during this process.
- Once the timer beeps, remove the jars from the Instant Pot and allow them to cool at room temperature.
- Transfer the jars to the refrigerator and refrigerate for 6 hours before consuming. Yogurt will last up to 7 days in the refrigerator.
Notes
- Don’t skip the sterilization step! Ensuring that the yogurt is not contaminated with unwanted bacteria is essential.
- Be sure to follow all of the steps for heating the almond milk. It is essential for killing unwanted bacteria.
- Only use sterilized utensils when stirring the almond milk mixture. Avoid using contaminated spoons or putting your finger in the mixture.
- If using a whisk, keep the whisk in the pot. Removing it can contaminate the utensil from unwanted bacteria on the countertop.
- When adding the vegan yogurt starter, do so in a cool place where it won’t be disturbed, and try to keep it away from air dust and potential kitchen mold spores.
- If the yogurt turns pink, it has come in contact with harmful bacteria. Discard the batch, and do not consume.
- Keep for up to 7 days in the refrigerator.
Kim
Absolutely adore this Homemade Almond Milk Yogurt! Silky-smooth, incredibly creamy, and delightfully tangy – it’s a vegan dream come true! The fact that it’s so easy to make is a huge bonus. Perfect for breakfast, snacking, or adding a luxurious touch to recipes. My go-to dairy-free delight now!
Caroline
I love the creamy texture this has, a great dairy alternative.
Tracy
What a great dairy free yogurt! My kids absolutely loved it with some granola and I love how easy it is to make!
Dina and Bruce
Made a big batch to have for breakfast this week. So tasty with fruit!
Suja md
Delicious yet simple recipe that the whole family loved. Can’t wait to make it again!