
Discover how to make a latte with our step-by-step guide. The art of crafting the perfect brew is simpler than you think.
Jump to:
- What Is A Latte?
- Ingredients Needed
- Equipment Needed
- How to Select the Best Coffee Beans
- How to Brew an Espresso Shot with an Espresso Machine – Step by Step
- How to Brew an Espresso Shot Without An Espresso Machine – Step by Step
- How to Froth Milk for A Latte – Step by Step
- Combining Espresso and Milk
- Tips for Creating Latte Art
- Optional Flavorings and Additions
- Spices and Extracts
- Recipe
Skip the coffee shop and make your latte at home. Lattes, also called cafe au lait, have a rich and creamy texture and are a popular coffee-based beverage enjoyed by coffee lovers worldwide. Whether you’re a seasoned barista or simply someone who appreciates a delicious cup of coffee, learning how to make lattes at home can be a rewarding experience. Crafting the perfect latte involves a combination of espresso, steamed milk, and a touch of artistry. In this guide, we will explore the step-by-step process of creating a delectable latte that rivals the ones from your favorite coffee shop. So, grab your espresso machine or stovetop coffee maker, and let’s embark on a journey to master the art of making lattes from the comfort of your own kitchen.
What Is A Latte?
A latte, also known as a café latte, is a popular coffee-based beverage that combines the richness of espresso with creamy steamed milk. It is typically served in a tall glass or ceramic cup and is beloved for its smooth and velvety texture.
The foundation of a latte lies in a single or double shot of espresso, which is brewed using finely ground coffee beans and hot water under pressure. This concentrated espresso is then infused with steamed milk, creating a harmonious balance between the strong, bold flavors of the coffee and the silky sweetness of the milk.
Lattes can be enjoyed as is or customized with various flavorings, such as vanilla, caramel, or hazelnut, to suit personal preferences. Whether indulging in a morning pick-me-up or seeking a comforting beverage throughout the day, lattes provide a delightful and satisfying coffee experience.
Use These Tips To Create These Simple Coffee Drink Recipes:
- Almond Milk Latte
- Soy Vanilla Latte
- Mocha Latte
- Turmeric Latte
- Matcha Latte
- Beet Latte
- Oat Milk Latte
- Vegan Pumpkin Spice Latte
- Lavender Tea Latte
Ingredients Needed
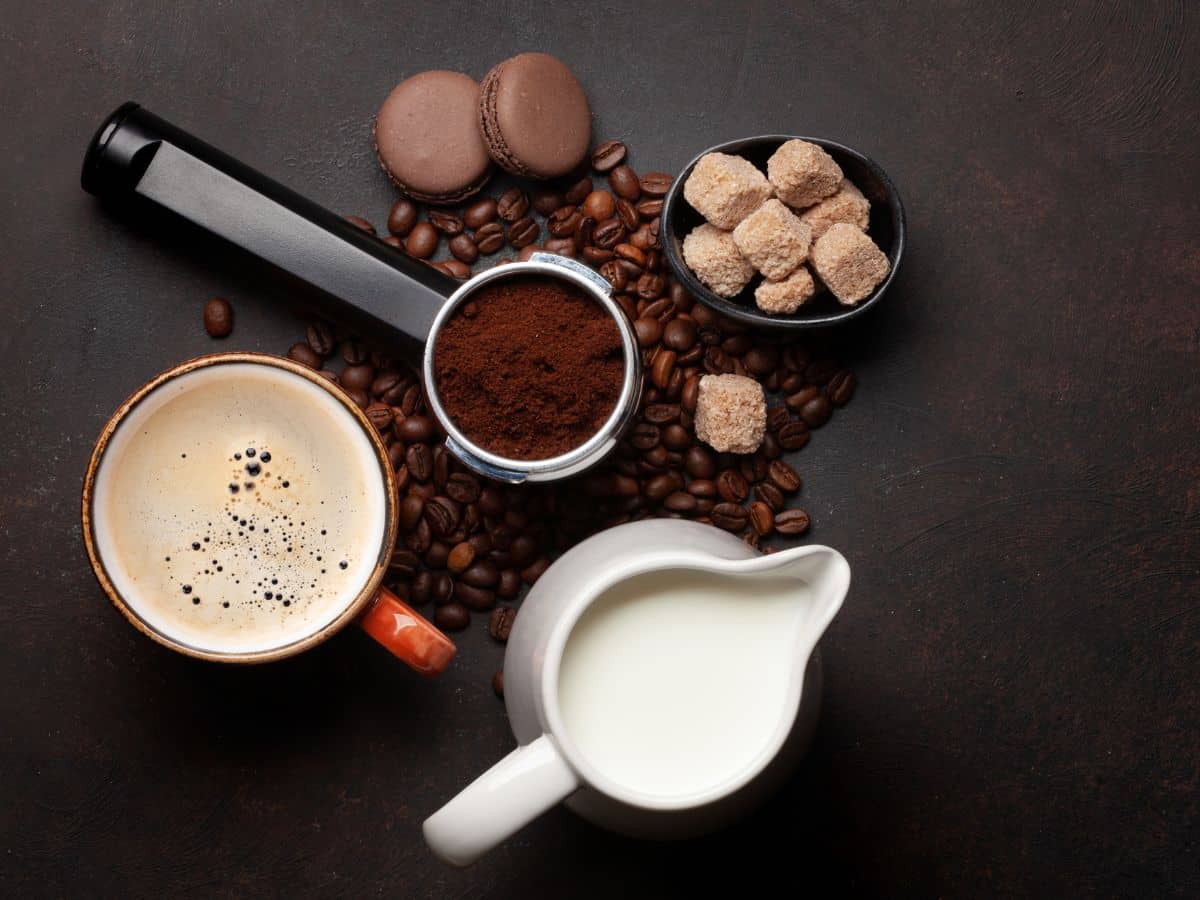
Lattes require two simple ingredients: high-quality coffee beans, and fresh milk. You can add optional flavorings if you like in the form of flavored syrups.
High-Quality Espresso Beans
Using high-quality coffee beans is crucial when making a latte to ensure a truly exceptional and enjoyable experience. The quality of the beans directly influences the flavor, aroma, and overall character of the latte.
Premium coffee beans are typically sourced from specific regions known for their favorable growing conditions, resulting in beans with complex and nuanced flavors. These beans are often roasted in small batches, allowing for optimal freshness and flavor preservation.
When brewed as espresso and combined with milk, high-quality coffee beans impart a rich and vibrant taste, with subtle notes of chocolate, fruit, or nuts. The superior quality of the beans also ensures a smooth and well-balanced cup, without any unwanted bitterness or off-flavors.
Fresh Milk
When it comes to choosing the best milk for making lattes, the ideal option is typically whole milk. Whole milk contains a higher percentage of fat, which contributes to the creamy and velvety texture that lattes are known for. The fat content in the milk foam adds richness and depth to the latte, enhancing the overall flavor profile.
Additionally, whole milk has a balanced sweetness that complements the bitterness of espresso, creating a harmonious and well-rounded taste. However, personal preferences and dietary considerations can also play a role in milk selection.
For those who prefer a lighter option, low-fat or skim milk can be used, although they may result in a slightly thinner consistency and less creaminess.
Alternatively, non-dairy milk alternatives such as almond, soy, coconut milk, or oat milk can be used to create dairy-free lattes, each imparting their unique flavors and textures. Ultimately, the choice of milk depends on individual taste preferences and dietary needs.
Equipment Needed
Mastering the art of latte-making requires a few key tools that enable you to achieve the perfect balance of espresso and frothed milk. From the brewing process to the precise milk preparation, the equipment you use plays a significant role in creating a café-quality latte in the comfort of your own kitchen.
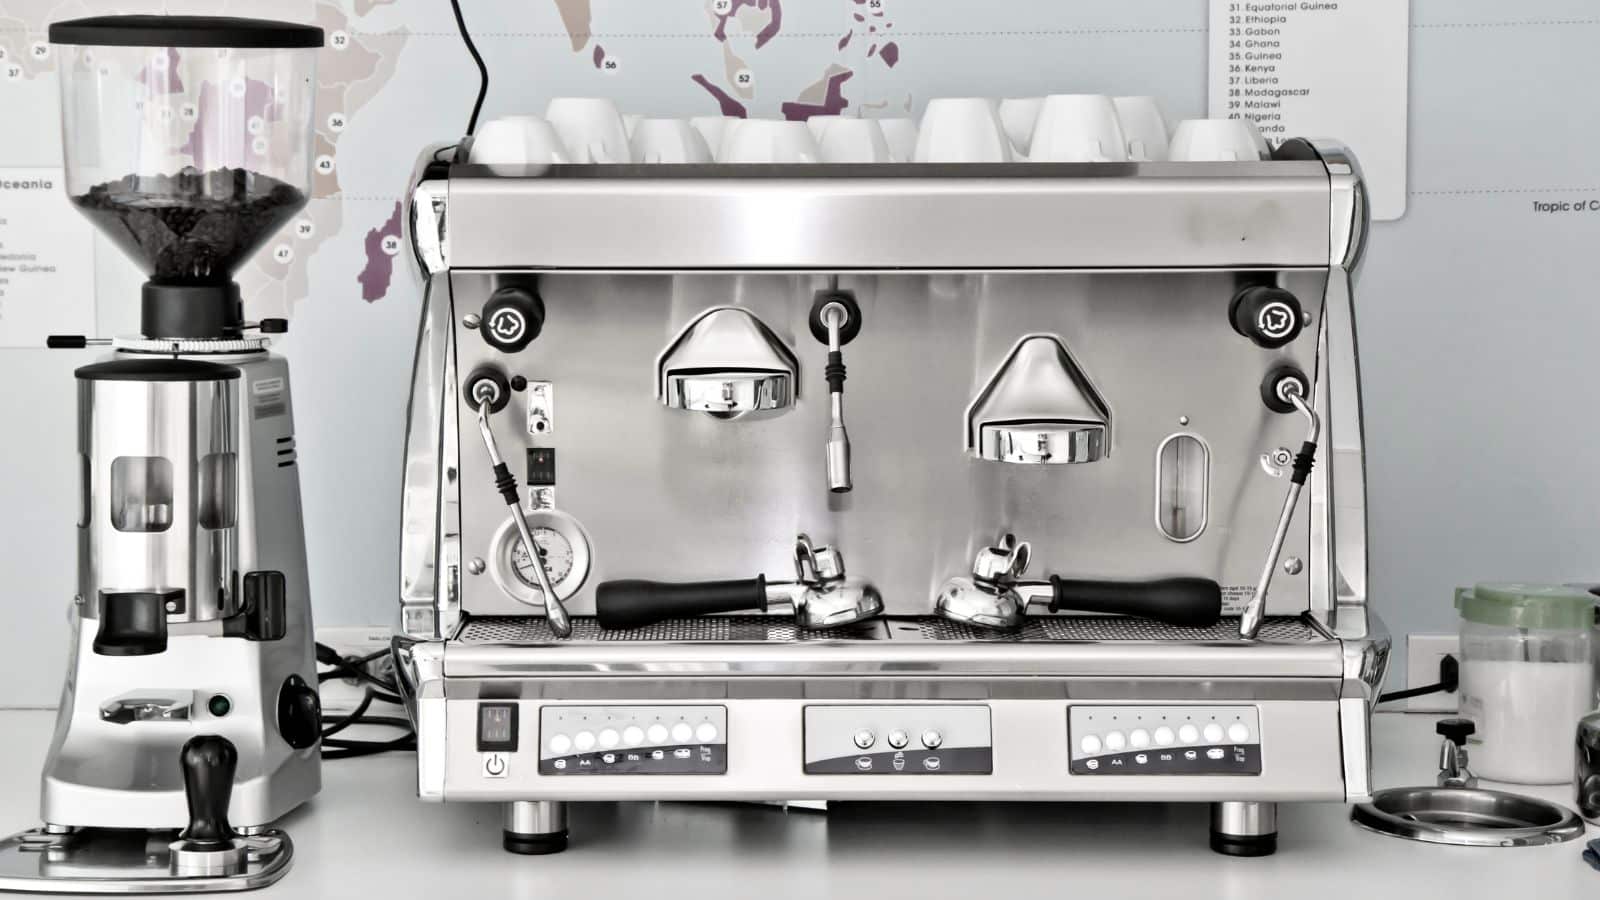
Espresso Machine
he best type of espresso machine for lattes is typically a semi-automatic or automatic machine. These machines offer more control over the brewing process, allowing you to extract espresso shots with consistent quality. Look for a machine that can deliver a consistent temperature and pressure for optimal extraction. Dual-boiler machines are especially advantageous as they provide separate boilers for brewing espresso and steaming milk simultaneously, ensuring efficiency and convenience.
Additionally, machines with built-in milk frothers or steam wands make it easier to achieve the velvety milk texture required for lattes. However, personal preferences and needs may vary, so it’s essential to consider factors such as budget, space availability, and desired features when selecting the best espresso machine for your latte-making adventures.
Top Rated Espresso Machines
Breville Barista Express Espresso Machine

The Breville Express Espresso Machine is a highly-rated espresso machine on the higher end of the price scale. The key benefit of this espresso machine is that it has a dose of 19-22 grams for full flavor. It uses precise temperature control that ensures that the temperature is kept at the optimum range for the best flavor. It uses low-pressure pre-infusion to evenly soak and expand the ground coffee, delivering a sweet and creamy extraction. The milk steamer attachment makes creating lattes a breeze.
Sincreative Espresso Machine with Grinder and Milk Frother

At a lower price than the Breville, the Sincreative Espresso Machine creates high-quality lattes with a built-in grinder and milk frother. Measure your coffee grounds precisely, and use the attached milk frother to steam fresh milk easily.

At the lowest price point, the Kwister Espresso Machine is highly rated for its 20 Bar Professional Pump that extracts rich crema and foams creamy milk quickly. Other features include constant temperature control, stable steam control, customized espresso volume, and a child lock function.
Milk Frother
When choosing a milk frother, look for one that offers both heating and frothing capabilities, allowing you to achieve the desired temperature and texture for your milk. Adjustable temperature settings are beneficial, allowing you to customize the milk’s warmth to your preference.
The frothing capacity is another crucial aspect, as it determines the amount of milk you can froth at once. Opt for a frother with sufficient capacity to meet your needs. A durable construction, preferably with a non-stick interior, ensures easy cleaning and longevity.
Additionally, a frother with different frothing options, such as cappuccino or latte settings, can provide versatility and the ability to experiment with various milk textures. Lastly, consider the ease of use and convenience features, such as intuitive controls, automatic shut-off, and the ability to easily detach and store the frother components.
Coffee Grinder
The type of coffee grinder that is generally recommended for making lattes is a burr grinder. Burr grinders offer consistent and precise grinding, resulting in a uniform particle size crucial for extracting the optimal flavors from the coffee. This consistency is especially important for espresso, as it allows for even extraction and ensures a balanced and rich flavor profile in your latte. Look for a burr grinder with adjustable settings, as this enables you to finely tune the grind size according to your espresso machine’s requirements. Additionally, consider a grinder with a sturdy build, reliable motor, and easy-to-clean features for long-lasting performance.
Tamper
A tamper is an essential tool used in the process of making espresso. It is a small, handheld device designed to evenly compact and distribute the coffee grounds in the portafilter. Typically made of metal, a tamper consists of a handle and a flat, circular base called the “tamper head.” When preparing espresso, the coffee grounds are loaded into the portafilter basket, and the tamper is then placed on top of the coffee grounds. Applying downward pressure and using a twisting motion, the barista or home barista tamps the coffee grounds firmly and evenly to create a level and compact surface. This ensures proper extraction by allowing the water to flow evenly through the coffee puck, resulting in a balanced and flavorful espresso shot.
Stainless Steel Jug
Using a stainless steel jug to froth milk for a latte is a straightforward process that can yield beautifully textured milk for your coffee creation.
Thermometer
A thermometer is crucial when making espresso because it helps ensure the optimal temperature for extracting the best flavors from the coffee. Temperature plays a vital role in the extraction process, as it affects the solubility and balance of the coffee compounds. Monitoring the temperature allows you to achieve consistency in your espresso shots. Espresso is typically brewed within a narrow temperature range, generally between 195-205°F (90-96°C). Using a thermometer ensures that the water temperature is within this ideal range.
How to Select the Best Coffee Beans
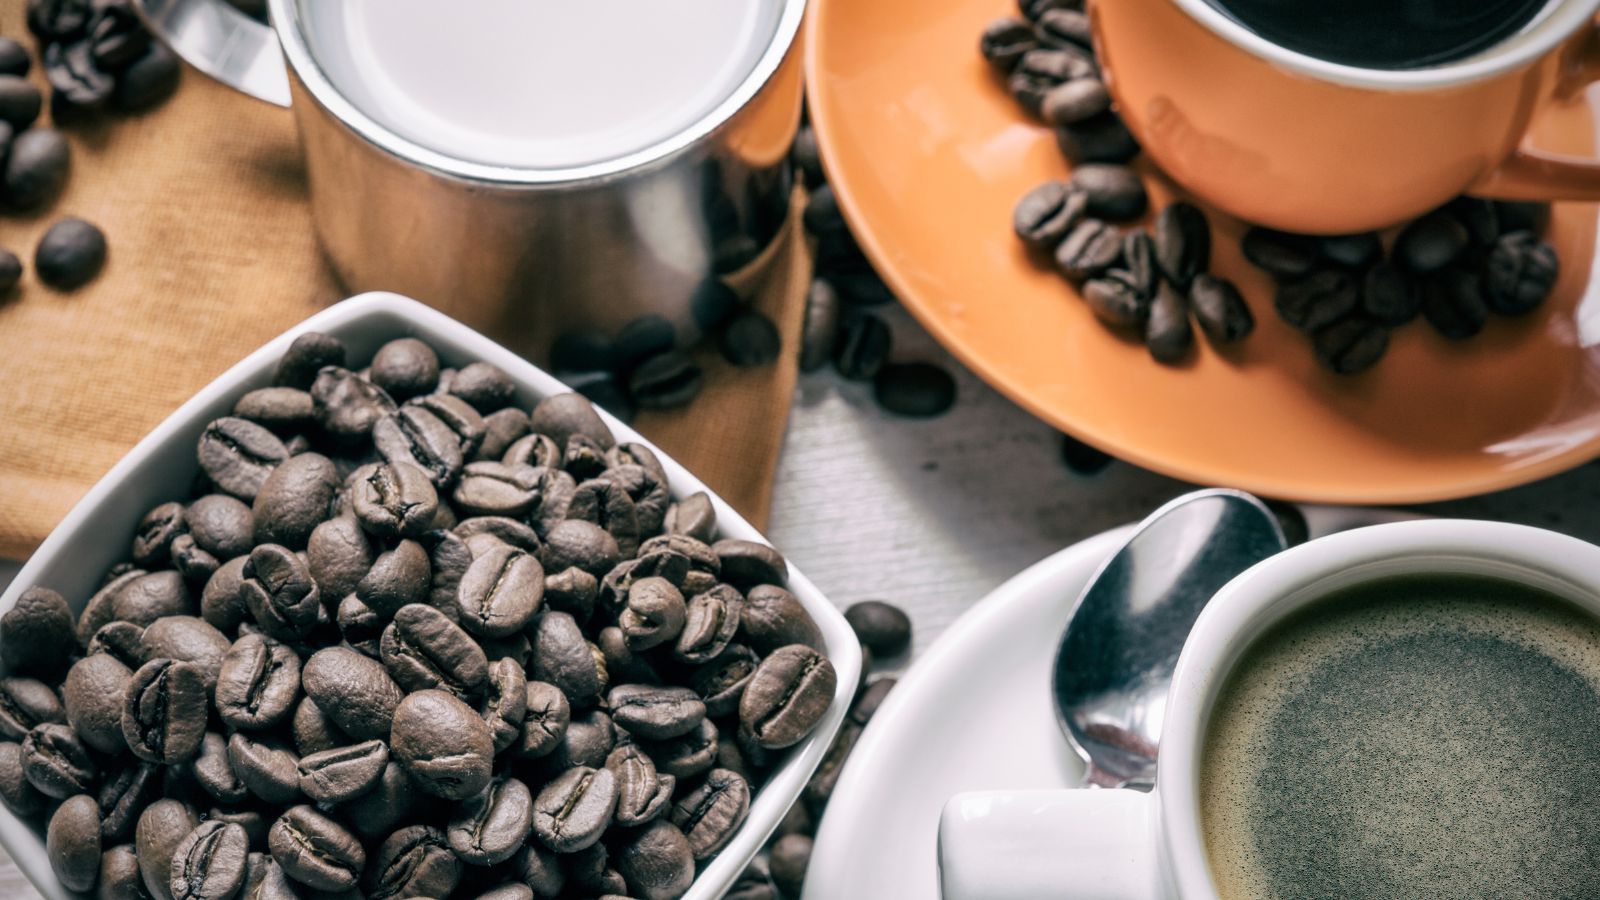
Importance of Freshly Roasted Beans: Look for freshly roasted beans, as this ensures optimal flavor and aroma. Single-origin beans from renowned coffee-growing regions can offer unique and distinct flavor profiles, while espresso blends often combine different beans to create a harmonious balance.
Different Coffee Bean Varieties: Opt for beans specifically labeled as espresso or espresso blends, as they are often crafted to deliver a well-balanced and concentrated flavor suitable for espresso extraction. Consider the roast level as well, as darker roasts tend to have bolder and more robust flavors that can withstand the intensity of espresso extraction.
Grinding Beans for Lattes: For espresso, coffee beans need to be ground to a fine consistency. The reason for this is that the water comes into contact with the coffee grounds for a relatively short period during the espresso extraction process. A finer grind allows for more surface area contact, resulting in a quicker and more efficient extraction. The ideal espresso grind should resemble a fine powder with a texture similar to table salt. When properly ground, the coffee particles should feel smooth and not overly gritty.
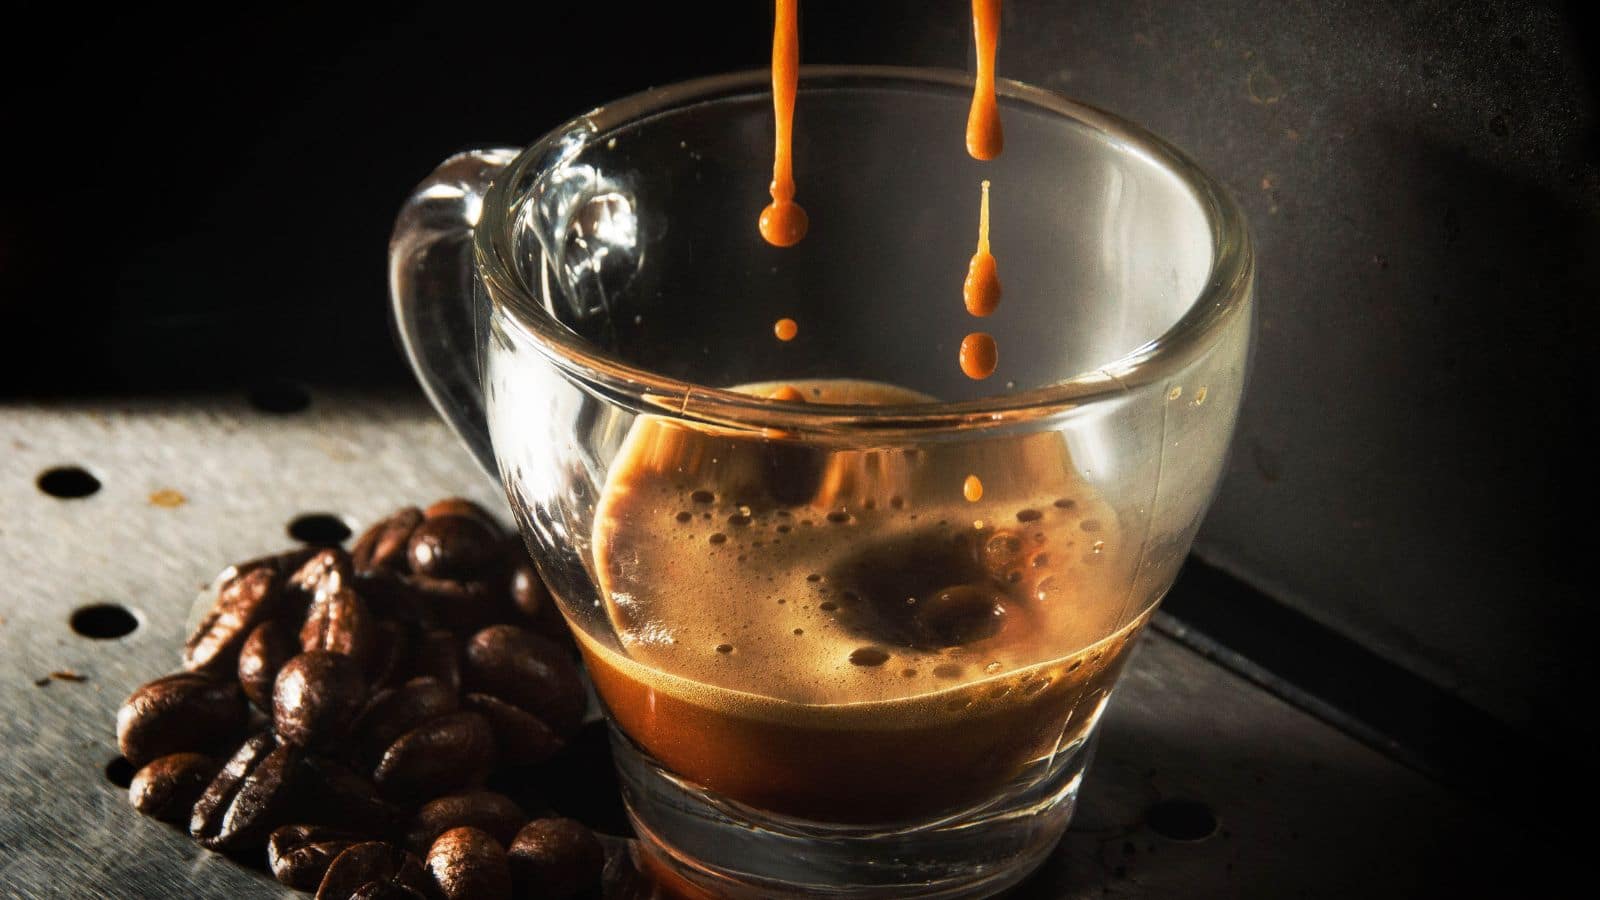
How to Brew an Espresso Shot with an Espresso Machine – Step by Step
- Prepare your espresso machine: Fill the water reservoir with fresh, filtered water and ensure it’s properly connected. Turn on the machine and allow it to preheat to the recommended temperature.
- Grind your coffee beans: Use a high-quality burr grinder to grind your coffee beans to a fine consistency, similar to table salt.
- Prepare the portafilter: Remove the portafilter from the espresso machine and gently tap it to remove any remaining coffee grounds. Insert a double-shot basket into the portafilter, and distribute the ground coffee evenly into the basket. Use a tamper to firmly press the coffee grounds down to create a level and compact surface.
- Insert the portafilter: Attach the portafilter back onto the espresso machine, ensuring it is securely locked in place. Place your espresso cup(s) beneath the portafilter to catch the brewed espresso.
- Start the extraction: Activate the espresso machine to start the extraction process. The water should be forced through the coffee grounds under pressure. The extraction time should typically be around 20-30 seconds for a double shot.
- Monitor the extraction: As the espresso is being extracted, observe the flow of the coffee into the cup. The ideal extraction should result in a steady stream of dark, rich espresso with a golden crema on top. Adjust the grind size, if necessary, to achieve the desired extraction time and appearance.
- Enjoy your espresso: Once the extraction is complete, remove the portafilter from the machine and set it aside. Your freshly brewed espresso is ready to be enjoyed as is or used as the base for a delicious latte or other espresso-based drinks.
How to Brew an Espresso Shot Without An Espresso Machine – Step by Step
- Grind your coffee beans: Start by grinding your coffee beans to a fine consistency, similar to what you would use for an espresso machine. Use a burr grinder for the best results.
- Boil water: Fill a kettle with fresh, filtered water and bring it to a boil. The water should be heated to approximately 195-205°F (90-96°C), the recommended temperature range for brewing espresso.
- Preheat your equipment: Preheat your cup or mug with hot water and allow it to sit for a minute or two. This helps maintain the temperature of your brewed coffee.
- Create a makeshift espresso machine: While you won’t have one, you can still manually create pressure. One popular method is a stovetop Moka pot or a manual espresso maker. These devices use steam pressure to extract the coffee.
- Assemble your makeshift espresso maker: If using a moka pot, fill the bottom portion with hot water up to the pressure release valve. Place the filter basket on top and fill it with the ground coffee. Attach the top chamber tightly to the base.
- Brew your espresso: Place the assembled espresso maker on the stove over medium heat. As the water heats up, steam pressure will build up, forcing the hot water through the coffee grounds. This process takes a few minutes. Keep an eye on the brew and remove it from the heat once you hear a gurgling sound.
- Pour and enjoy: Carefully pour the brewed espresso into your preheated cup or mug, avoiding any grounds that might have accumulated at the bottom. Serve it as is or use it as a base for other espresso-based beverages.
- Clean your equipment: After brewing, disassemble your makeshift espresso maker and rinse it thoroughly with warm water. Ensure all the coffee grounds are removed, and allow the parts to dry completely before storage.
How to Froth Milk for A Latte – Step by Step
- Choose the right milk: Start by selecting the type of milk you prefer, such as whole milk for a richer taste or non-dairy alternatives like almond, soy, or oat milk for a plant-based option.
- Pour milk into a stainless steel pitcher: Take a stainless steel milk frothing pitcher and pour the desired amount of cold milk into it. It’s important not to fill it more than one-third of the way to allow room for expansion during frothing.
- Position the steam wand: Place the steam wand of your espresso machine into the milk pitcher, ensuring that the tip is just below the surface of the milk but not touching the bottom of the pitcher.
- Purge the steam wand: Before starting the frothing process, open the steam wand briefly to purge any residual water or condensation.
- Froth the milk: Turn on the steam wand and allow it to create a swirling motion in the milk. Tilt the pitcher slightly to achieve the best results. Keep the wand at the pitcher’s side without touching the bottom to create a vortex and incorporate air into the milk.
- Control the frothing process: As the milk starts to froth, gradually lower the pitcher while maintaining the depth for frothing. The goal is to create a creamy microfoam with tiny bubbles and a smooth texture. Pay attention to the temperature and texture of the milk, adjusting the position of the steam wand and the pitcher’s angle as needed.
- Monitor the temperature: Use a thermometer to monitor the milk’s temperature. For a latte, aim for a temperature between 140-160°F (60-71°C). Be careful not to overheat the milk, as it can affect the taste and texture.
- Finish and tap the pitcher: Once the milk has reached the desired temperature and froth consistency, turn off the steam wand and remove it from the pitcher. Give the pitcher a gentle tap on a solid surface to eliminate any large bubbles and create a smooth texture.
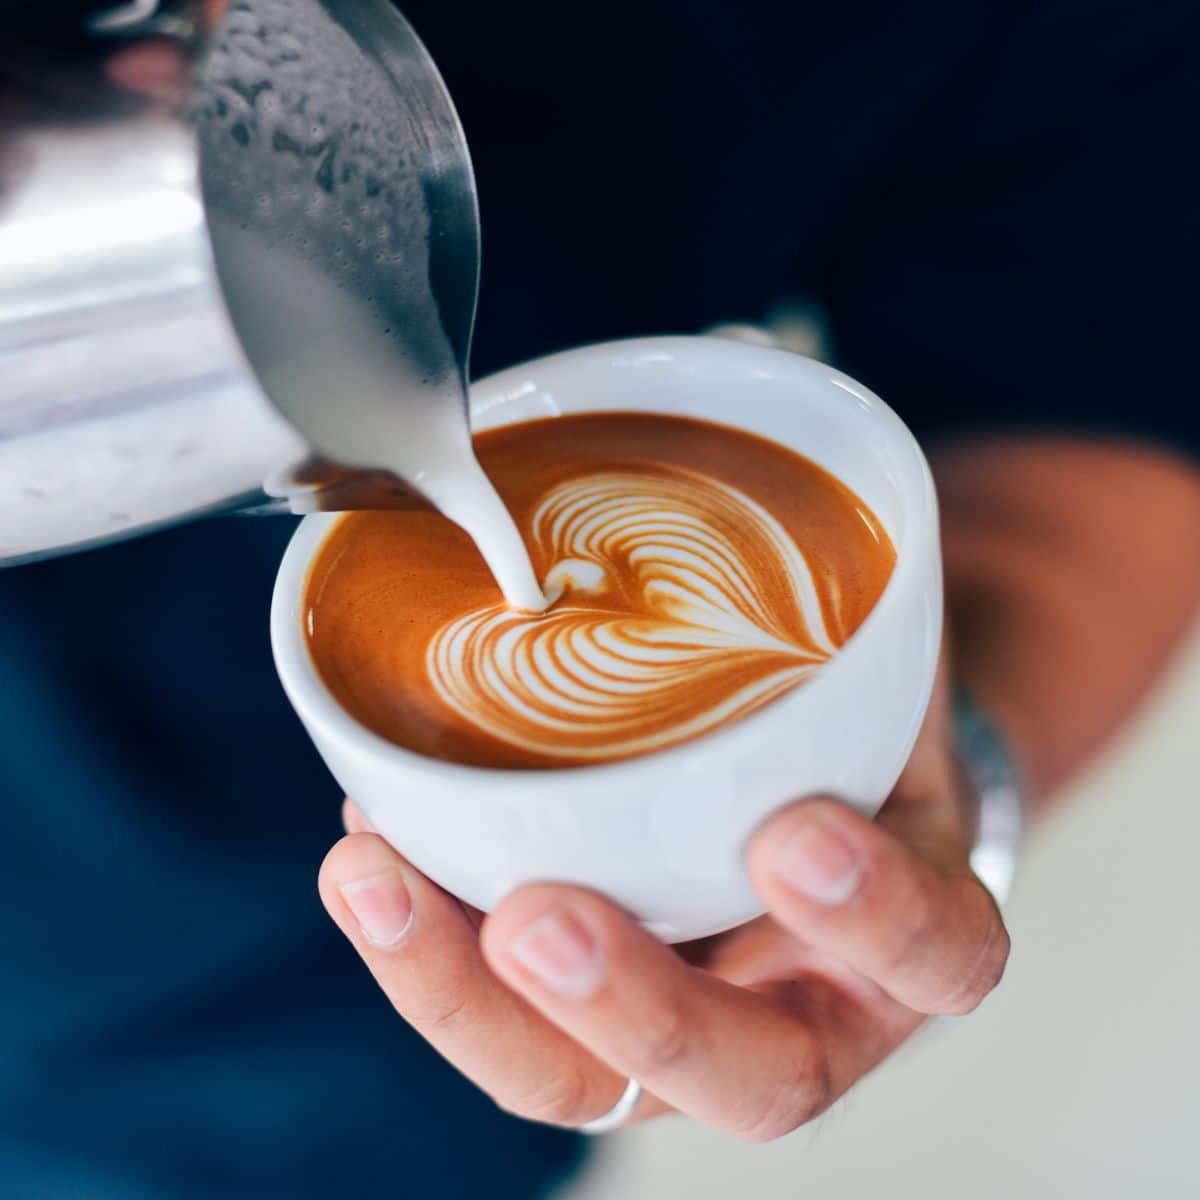
Combining Espresso and Milk
Pour the frothed milk into your prepared espresso shot, starting from a higher distance to create a layered effect. Use a spoon to hold back the foam while pouring, allowing it to float on top. With practice, you can also attempt to create latte art by gently swirling or drawing patterns on the surface with the milk.
Tips for Creating Latte Art
- Use the right milk: Whole milk is generally preferred for latte art due to its higher fat content, which creates a smoother texture and better froth stability. Experiment with different milk alternatives to achieve latte art with non-dairy options.
- Froth the milk correctly: Properly frothing the milk is essential for creating a good canvas for latte art. Aim for a velvety microfoam with small, consistent bubbles. Ensure the milk is not overheated, as it can affect the taste and texture.
- Start with a good espresso shot: A well-extracted espresso shot forms the base for your latte art. Ensure your espresso shot has a balanced flavor and a rich crema layer. Consistency in your espresso extraction is key to achieving better latte art results.
- Use the right tools: Invest in a quality stainless steel milk frothing pitcher, a latte art pen, or a fine-tipped utensil for drawing patterns. The right tools can make a significant difference in your latte art precision.
- Control milk pouring speed: The speed at which you pour the milk into the espresso can affect the outcome of your latte art. Start with a slow pour to create a solid base, then increase the speed to create contrast and texture.
- Master the basic latte art patterns: Practice simple designs such as hearts, rosettas, and tulips. Focus on understanding the milk flow, pour technique, and wrist movement required for each pattern. Mastering the basics will provide a foundation for more intricate designs.
- Experiment with contrast: Create contrast by pouring darker milk into lighter crema or vice versa. This contrast helps define the patterns and highlights the details in your latte art.
- Practice control and consistency: Consistency in your pour speed, angle, and milk texture is crucial. Practice creating even, controlled patterns by maintaining steady hand movements and pouring techniques.
- Be patient and persistent: Creating latte art takes time and practice. Don’t get discouraged if your first attempts are not perfect. Keep practicing, experimenting, and refining your technique.
Optional Flavorings and Additions

Syrups and Sauces
- Vanilla syrup: Vanilla syrup adds a sweet and aromatic flavor to lattes, enhancing the overall taste profile without overpowering the coffee.
- Caramel syrup: Caramel syrup is a sweetener that brings a rich, buttery, and slightly sweet flavor to lattes. It pairs particularly well with espresso and adds a delightful caramelized note.
- Hazelnut syrup: Hazelnut syrup offers a nutty and slightly sweet flavor that complements the richness of espresso. It can create a delightful hazelnut latte with a touch of warmth.
- Chocolate syrup: Chocolate syrup is a classic addition to lattes, bringing a rich and indulgent chocolatey flavor. It can be used to create a mocha latte by combining chocolate and espresso.
- Cinnamon syrup: Cinnamon syrup adds a warm and spicy note to lattes. It blends well with the creamy texture of milk, creating a comforting and aromatic drink.
- Peppermint syrup: Peppermint syrup infuses lattes with a refreshing and minty taste. It’s especially popular during the holiday season, creating a festive peppermint latte.
- Mocha sauce: Mocha sauce combines chocolate and coffee flavors, creating a rich and decadent addition to lattes. It’s perfect for those who enjoy a strong chocolate presence in their drinks.
- Salted caramel sauce: Salted caramel sauce adds a delightful balance of sweet and salty flavors to lattes. It brings a unique twist to the traditional caramel latte.
- Simple syrup: It is made by dissolving equal parts of sugar and water together. The most basic recipe for simple syrup involves combining one cup of granulated sugar with one cup of water.
Spices and Extracts
- Cinnamon: Ground cinnamon adds warmth and a touch of spice to lattes. Sprinkle a pinch of cinnamon on top of your latte or incorporate it into the milk during the frothing process.
- Nutmeg: Freshly grated nutmeg offers a warm and aromatic flavor. Use a small grater to sprinkle a hint of nutmeg over your latte for a cozy and fragrant twist.
- Ginger: Ground ginger brings a spicy and invigorating kick to lattes. Add a pinch of ginger to your espresso grounds before brewing or stir in a bit of ginger syrup.
- Cardamom: Ground cardamom adds a unique and exotic flavor to lattes. Sprinkle a small amount of cardamom powder over the milk or infuse it into the coffee grounds before brewing.
- Vanilla extract: A few drops of high-quality vanilla extract can enhance the sweetness and aroma of lattes. Add it to the milk or stir it into the espresso shot before combining with milk.
- Almond extract: Almond extract imparts a delightful nutty flavor. Add a few drops to your latte for a subtle and fragrant almond twist.
- Peppermint extract: Peppermint extract lends a refreshing and minty taste to lattes. Add a drop or two to create a refreshing peppermint latte.
- Coconut extract: Coconut extract adds a tropical and creamy flavor to lattes. Incorporate a small amount into the milk or sprinkle some toasted coconut flakes on top of your latte for an extra touch.
- Maple syrup: Maple syrup provides a natural sweetness and rich flavor to lattes. Stir in a small amount of maple syrup to infuse your latte with a hint of maple goodness.
- Lavender: Dried culinary lavender can add a floral and aromatic essence to lattes. Infuse the milk with a pinch of dried lavender buds for a delicate and calming flavor.
Chocolate Shavings and Other Toppings
- Whipped Cream: Top your latte with whipped cream for a special treat.
- Chocolate Sauce: Drizzle the top of your latte with chocolate sauce for a mocha.
Please comment below if you found this article helpful or have any additional questions. You can also follow me on Instagram, Pinterest, and Facebook for more family-friendly vegan recipes!
Recipe

How to Make A Latte
Equipment
Ingredients
- 1 shot espresso approximately one ounce
- 8 ounces milk of choice
- 1 tsp sugar optional
Instructions
- Brew a shot of espresso using an espresso machine or a stovetop coffee maker according to the manufacturer's instructions. Set it aside.
- Pour milk into a small saucepan and heat it over medium heat. Stir occasionally to prevent scorching. Heat the milk until it reaches a temperature of around 150°F (65°C), or until it is hot but not boiling. While the milk is heating, you can froth it to create a creamy texture.
- While the milk is heating, you can froth it to create a creamy texture. There are several ways to froth milk:1. Use a frother: If you have a handheld milk frother or a steam wand on your espresso machine, froth the milk until it develops a velvety and airy consistency.2. Shake method: Pour the hot milk into a lidded jar, leaving some room for air. Close the jar tightly and shake vigorously for about 30 seconds until the milk becomes frothy.3. Whisk method: Heat the milk and then vigorously whisk it in a bowl using a wire whisk until frothy.
- Once the milk is frothed, pour the espresso shot into a mug. Slowly pour the frothed milk over the espresso, holding back the foam with a spoon to retain it for later.
- Gently stir the milk and espresso together to combine the flavors.
- If desired, add sugar to the latte and stir until dissolved. Adjust the sweetness according to your taste preferences.
- Top the latte with the reserved milk foam. You can create latte art by pouring the foam in a controlled manner.
Notes
- Start with freshly brewed espresso for the best flavor.
- Use whole milk for a creamy and rich texture, but feel free to substitute it with your preferred milk alternative.
- Heat the milk slowly over medium heat to avoid scorching.
- Froth the milk until it has a velvety texture and incorporates air bubbles.
- Pour the espresso into the mug first, then pour the frothed milk over it slowly.
- Gently stir the milk and espresso together to combine the flavors.
- Experiment with flavored syrups, such as vanilla or caramel, to add a personalized touch.
- Practice creating latte art by pouring the milk foam in a controlled manner.
- Garnish with a sprinkle of ground cinnamon, cocoa powder, or a drizzle of caramel for added visual appeal.
Celestine C.
Wow, this is amazing! I’ve always wanted to learn how to make a latte, and your step-by-step guide seems like the perfect solution. The art of crafting the perfect brew may have seemed daunting before, but your simplified approach gives me hope that I can create a delicious latte right at home. Thank you so much for sharing this valuable information with us!
Casey
I can’t believe how easy this was! Sorry Starbucks, I can make it at home now!
Chenee
I’ve always wanted to make a latte but I haven’t tried it yet. Thanks so much for the tips. They give me confidence!
Jess
I love when I can make something at home instead of going out for it. Saves so much money!
dana
Awesome tips here! I have a fancy coffee machine that makes lattes but I haven’t travelled past the coffee setting yet, lol. Now’s the time!
Diana Reis
Making my latte at home is a commitment, but so worth it. Great tips to get it just right.